How to Stop Patches from Scalping While Mowing

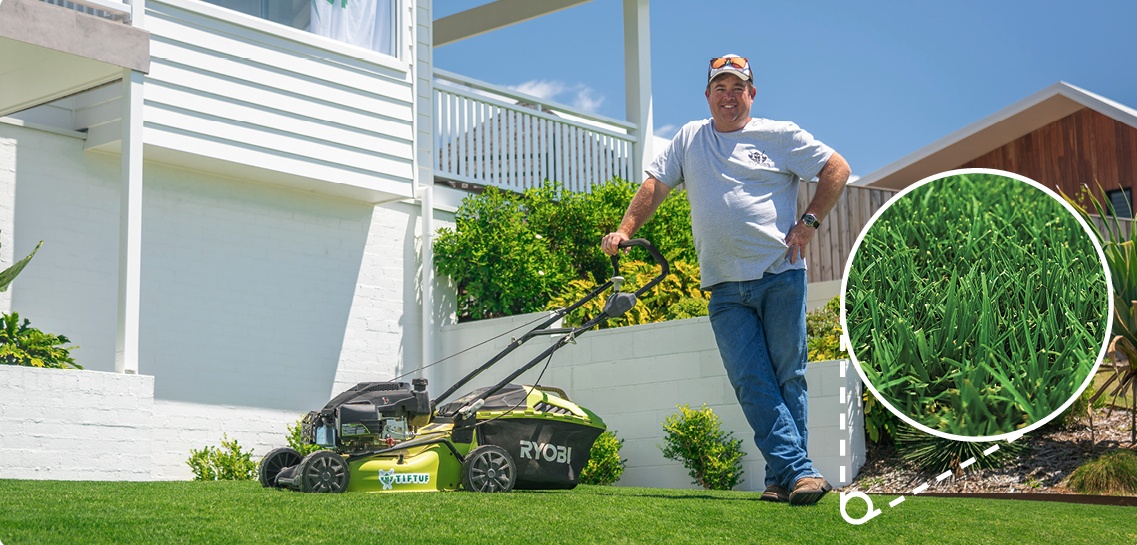
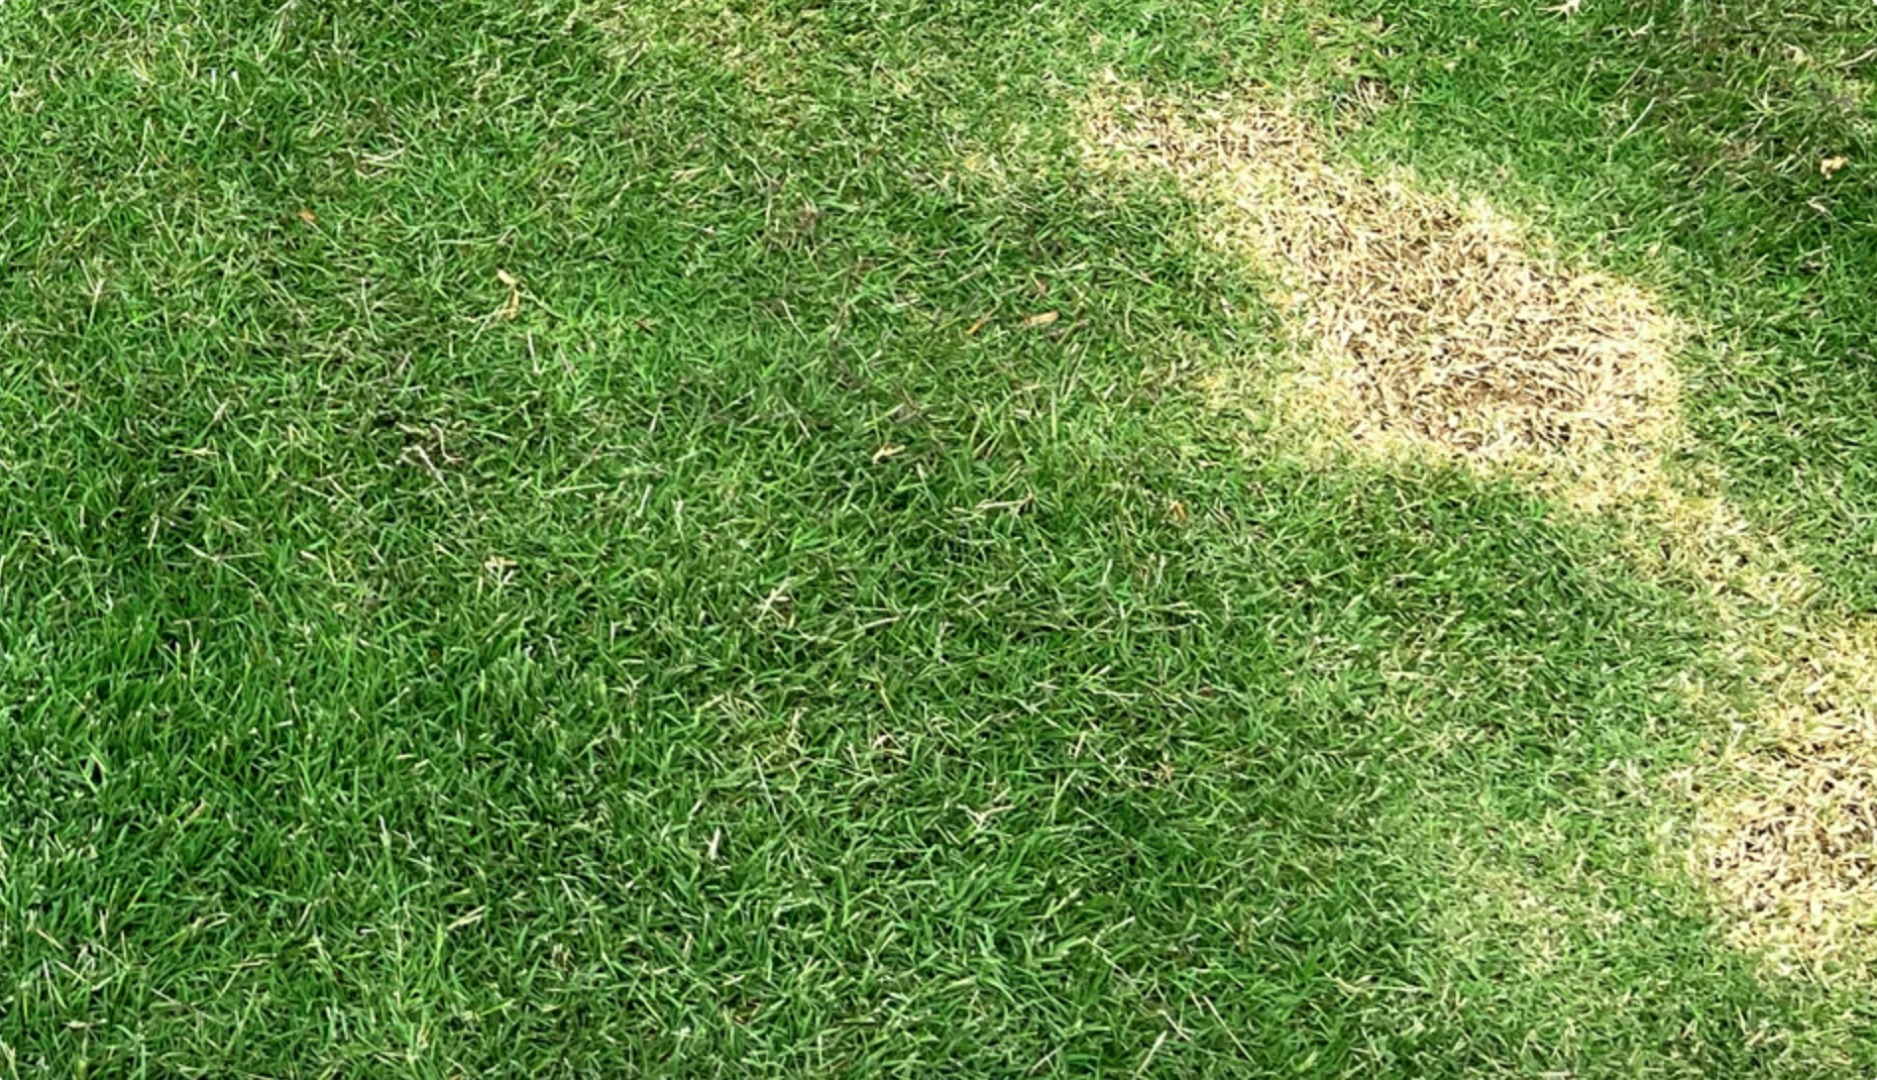
Have you noticed patches appearing on your lawn from scalping after you have given your lawn a mow? In this blog, we look at why this occurs and how to avoid scalping your lawn when mowing.

Determine Why Your Lawn is Scalping

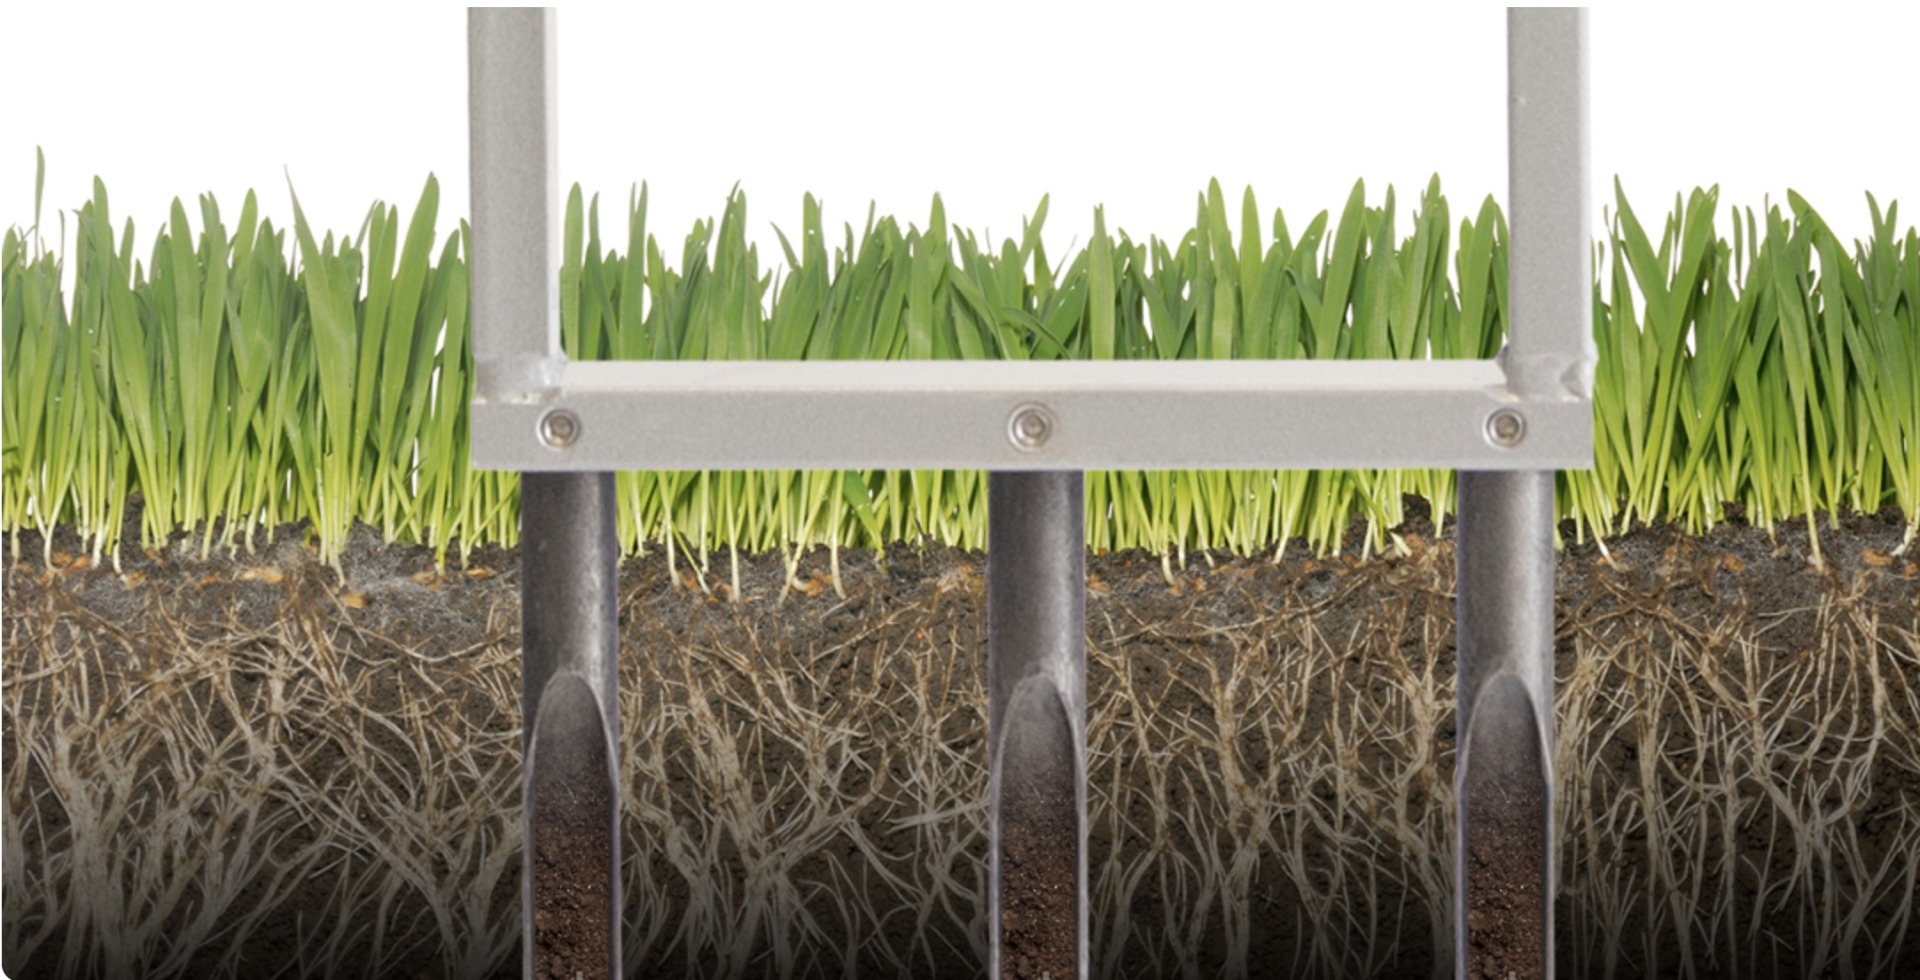
The first step is to determine why scalping is occurring. Scalping occurs when a lawn is mown too short. When too much of the leaf is removed, it will cause the grass to look brown in patches.

Here are some reasons why scalping might be occurring on your lawn.

  • Has the lawn been growing too long in between mows?
  • Are your lawns levels uneven? Are there high and low sections of the lawn?
  • Does your lawn have an accumulation of thatch?

How to Reset the Height of Your Lawn

If scalping occurs from your lawn growing too long in between mows or an accumulation of thatch it is best to reset the height if your grass.

To do this, give the lawn a low mow a notch or two below your normal/preferred mowing height. If your lawn has an accumulation of thatch, you may need to bring down the mower a few more notches to allow it to reach down into the thatch layer. (When lowering the mowing height on Buffalo it is best to ensure you are not mowing too low and cutting into the runner). After you mow the lawn, it won’t look great at first, but it will be able to recover over the coming weeks. During this recovery period, it is best to ensure you keep water up to the lawn. Raise your mower back up to your preferred mowing height on your next mow. This process is best done while the lawn is actively growing throughout the warmer months and should be avoided in the cooler months while your lawn is growing at a slower rate.

After this, you will need to ensure you are frequently mowing to help avoid scalping the lawn again. As a rule of thumb, mow your lawn frequently enough so that only one-third of the leaf is removed with each pass. This means you will need to mow more frequently in warmer months as the grass grows faster. Conversely, you won’t need to cut as often in the cooler months as the grass will grow slower.

dethatching

How to Fix Your Lawns Levels

If scalping occurs from mowing over high spots in your lawn, you can add soil/sand to amend the lawn levels. This process is known as top dressing. When top dressing to improve levels, we recommend using sand. Something like washed plasterers’ sand or washed river sand is ideal.

When top dressing, it is best to give the lawn a low mow beforehand to ensure the top-dressing material will reach the soil profile. Best to also ensure at most 5-10 mm thickness is applied at one time. The sand should be rubbed in evenly using a lawn-leveller bar or the back of a rake to work the sand into the profile.

Check out our blog here for more information on applying a top dressing here.

top dress

Other Mowing Tips 

Now you are fully equipped to help stop scalping from occurring. We have a few final tips to ensure you will get the best cut when mowing.

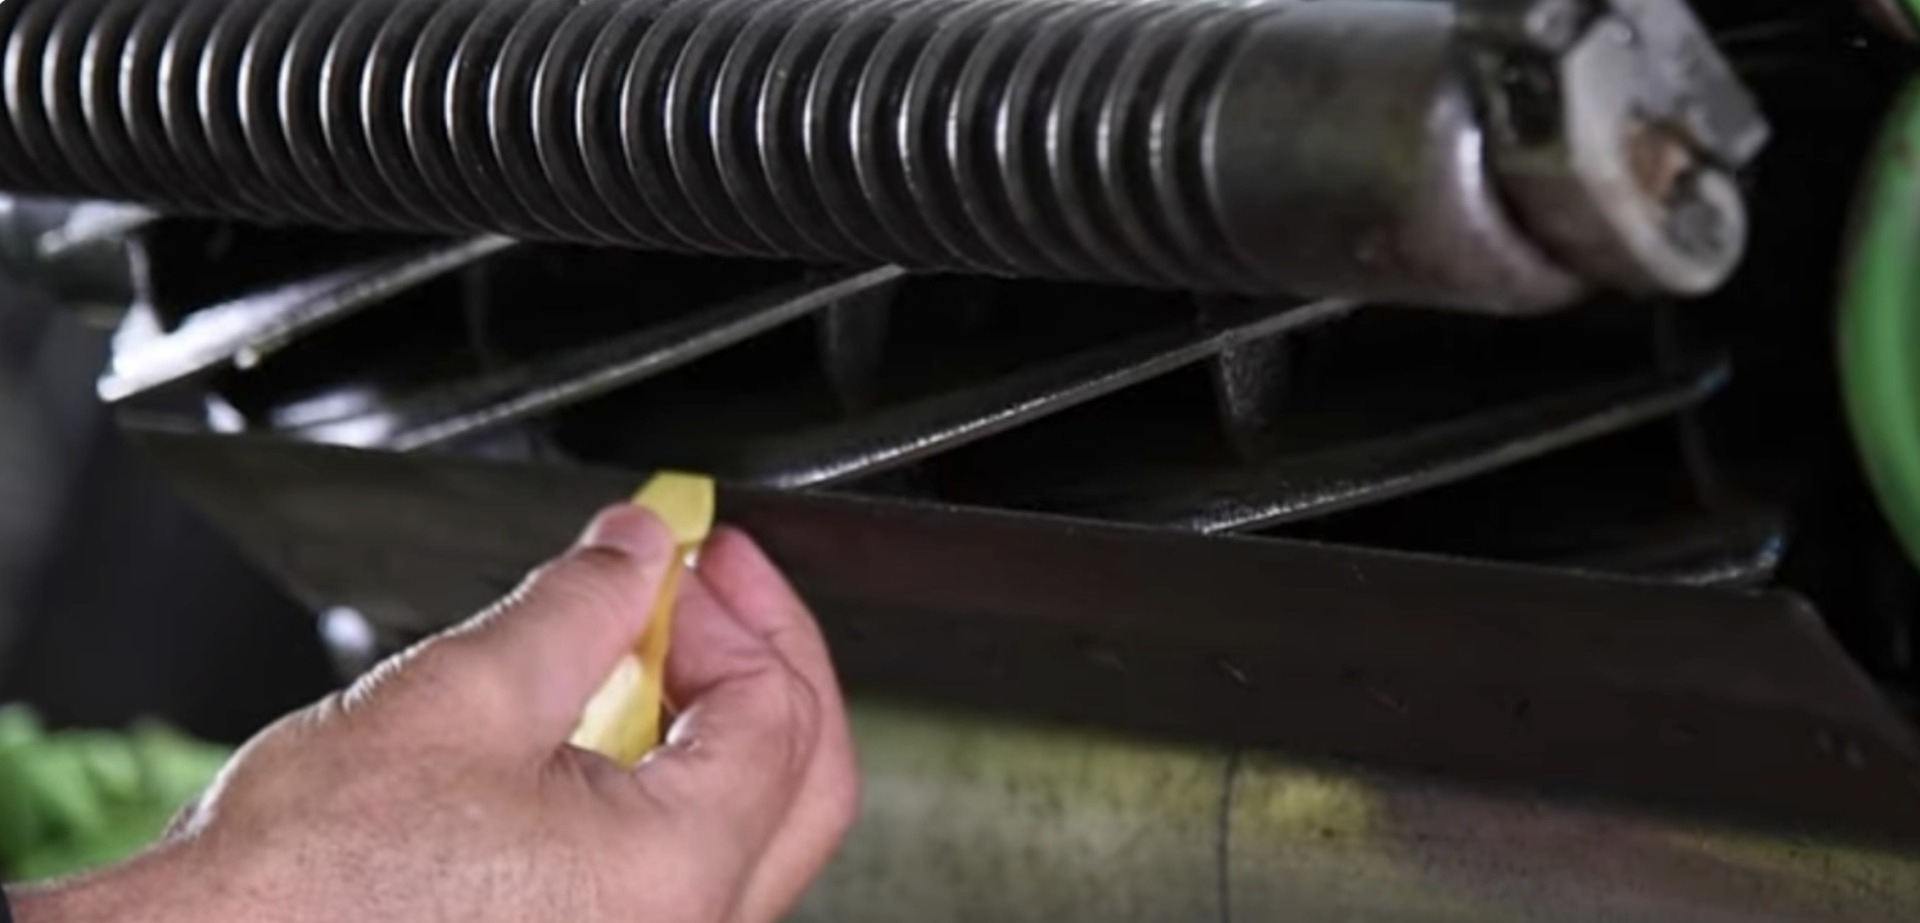
  • Ensure your mower has sharp mower blades.
  • Mow when the lawn is dry, and try to avoid mowing when the lawn is wet.
  • Mow at the same length and keep it consistent.
  • Switch mowing directions.
  • Mow in the mornings or afternoons. Avoid mowing in the middle of the day.
  • Keep at a constant pace.

As always, if you have any more questions please don’t hesitate to contact us for free expert advice on 1800ALLTURF (1800255873) or 07 5543 8304.

What is the Best Couch Grass?

The best couch grass in Australia is TifTuf Hybrid Bermuda (Couch).

tiftuf hybrid bemuda

TifTuf has proven itself as the best performer in independent trials both here in Australia and in the US.

In Australia, the Sports Turf Research Institute (STRI) conducted a trial evaluating the “Performance of bermuda (couch) grass cultivars under different shade, irrigation and wear treatments”. The Sports Turf Research Institute (STRI) conducts world-leading testing and research for developing innovative techniques and products to improve turfgrass and sports surfaces.

TifTuf Hybrid Bermuda was a clear stand-out performer in this trial outperforming all other available couch grasses.

TifTuf was also the best performing couch grass in US turf trials called the NTEP (National Turf Evaluation Program). TifTuf led from the front and was in the top 25% of grasses across all states and measures trialled, over 92.9% of the time.

Which couch grass is the most drought-tolerant?

TifTuf Hybrid Bermuda is the world’s leading turf grass for superior water efficiency and drought tolerance. The only grass in Australia or the world to be awarded the Smart Approved WaterMark for drought tolerance is TifTuf.

TifTuf was bred to be drought tolerant and save water. With TifTuf becoming the new benchmark when it comes to measuring the drought tolerance of turf. Read drought trial results here.

What is the most hard-wearing couch grass?

TifTuf Hybrid Bermuda is the most hard-wearing and has incredible recovery and self-repairing qualities. When subjected to a range of trials under different shade, irrigation and wear treatments, TifTuf was the best-performing turf grass trialled.

What grass do they use on sports fields in Australia?

Most elite sporting surfaces in Australia are couch grass surfaces. Hybrid couch (Bermuda) grasses in recent years show superior qualities and are the go-to surface for installation on new and improved sporting turf facilities. For sports fields looking to install the best grass for their facilities, the best couch grass is TifTuf Hybrid Bermuda.

tiftuf grass
TIFTUF AT REDCLIFFE DOLPHINS STADIUM

TifTuf Hybrid Bermuda is the product of almost 25 years of research and development from one of the world’s leading turfgrass breeders, the University of Georgia in Tifton. Tifton is famous for grasses like Tif Eagle, Tif Sport and now TifTuf.

Out of tens of thousands of couch grasses, TifTuf was selected as the best performing and most drought-tolerant turf trialled.

As always, if you have any more questions please don’t hesitate to contact us for free expert advice on 1800ALLTURF (1800255873) or 07 5543 8304.

What’s the Best Grass Around Pavers and Concrete

Have you ever wondered what’s the best grass you should use around paving, concrete, and other surfaces? This blog looks at a range of options you can use in your outdoor space.

What’s the Best Grass Around Paving 

When using grasses around paving, we recommend choosing a grass type that won’t grow particularly tall and will grow thick around the paving. If you plan to have pavers across your lawn, we recommend going for a slower-growing grass like Sir Grange Zoysia or Sir Walter DNA Certified Buffalo.

Sir Grange Zoysia

Sir Grange Zoysia is a slower-growing boutique grass that looks great with little maintenance. This grass has a stunning fine leaf, with a beautiful dark green colour, and is slow growing. This grass can even be left unmown! The Sir Grange also doesn’t grow particularly long, so it works well in landscaped areas. This is a slower-growing grass. So, it won’t have as fast repairing nature as other warm-season grasses like couch and buffalo grass. So, it is best used in low traffic areas that will not be used by pets and kids, or where the paving will be walked on, instead of the lawn.

As this grass is a slow grower, it can take some time to establish. Sir Grange Zoysia also requires a bit of extra ground preparation work when installing. For more information on the installation and establishment of Sir Grange Zoysia, click here.

Sir Grange Zoysia

Moderate Traffic Areas Around Paving

If you are installing grass in an area with pavers or other surfaces like concrete that will receive more foot traffic or will be used by pets and kids, we recommend having a look at Sir Walter DNA Certified Buffalo.

Sir Walter DNA Certified Buffalo grass has a higher wear tolerance and a faster repairing nature than Sir Grange Zoysia. Sir Walter has a soft broad leaf, high shade tolerance, and excellent with pets and kids. This grass is low maintenance, and well-suited to the Australian Climate.

High Wear Areas

For choosing a turf type in high-wear areas along a driveway or other surfaces, we recommend looking at TifTuf Hybrid Bermuda or Sir Walter DNA Certified.

For turfed areas along driveways and paths, look at using faster-growing grass. Although you will need to keep in mind the lawn may need its edges done from time to time. Edging along driveways and paths will be much easier to maintain as they are mostly straight. Please check out our blog on edging for more information here.

If you want your lawn to sit flush with a concrete surface, we recommend leaving about 30-40mm below the height of the other surface. This will allow for the thickness of the turf. Best to chat with your local turf supplier for exact measurements of how thick they are cutting their turf.

dog lawn

Ground Cover Alternatives

There is an excellent range of other ground covers that you can use around paving. These ground covers are a good option to look at using in smaller areas, like alongside of the house or on small pathways. When choosing plants, it is best to look for something that is low growing and can spread to prevent weeds from growing. A few options include Baby Tears, Dwarf Mondo Grass, Dichondra Silver Falls, and Blue Star Creeper.

As always, if you have any more questions please don’t hesitate to contact us for free expert advice on 1800ALLTURF (1800255873) or 07 5543 8304.

The Lawn Weed Removal Guide

If you mow your lawn correctly and frequently, you should manage to avoid the invasion of most weeds. But if you have found that some of these undesirable weeds have infiltrated your lawn, then there is a few methods for weed removal.

Weed Removal Options

Hand Removal

Many small weeds can be carefully pulled out by hand; however, you will need to make sure you have removed the roots. Using a weeding trowel or long handled mechanical device and prizing around the roots will help ensure total removal. The bigger the weed, the bigger and stronger the roots.

To make this job a little easier, you might want to try something like the Wolf Garten Ergo Weeder. It is very easy to use and saves you from bending down. It quick and easily digs down underneath the weed and when extracted removes the entire weed, roots and all.

Herbicide Treatment Options

There are various herbicides available, including selective and non-selective types.

Non-selective products like Round Up (Glyphosate) kill most plants including your lawn; selective herbicides target specific weeds only.

It is strongly recommended that you consult your local nursery or turf expert to properly identify the weed in question first, so you can treat it with an appropriate and effective spray.

Post-emergent Broadleaf Herbicides

For common broadleaf weeds like cudweed, clover, bindii or creeping oxalis, you can use a broadleaf herbicide like Amgrow Bin die or Lawn Solutions All Purpose Weed Control. These products generally contain actives like Bromoxynil, MCPA and Dicamba. For buffalo lawns, except ST varieties, make sure you use the Bromoxynil based products like Lawn Solutions All Purpose Weed Control as Dicamba can harm your buffalo grass.

Some other weeds require a particular herbicide for treatment, so identification is very important.

Quick selective weed killer solutions guide

  • Winter Grass – Amgrow Winter Grass Killer (Not safe on Kikuyu or Fescue)
  • Nutgrass / Mullumbimby Couch – Lawn Solutions Sedge Control
  • Paspalum, Crabgrass, Summer grass – Paspalum herbicides contain the active DSMA. Make sure it’s safe to use on your turf as many varieties like buffalo and kikuyu are spot treatment only.

Prevention – Pre-emergent Herbicides

There is also a way to prevent some weed types from appearing at all.

A pre-emergent herbicide like Oxafert targets weed seeds before they take hold by forming a barrier at soil level that stops the germination of any new seedlings. Pre-emergents can be used in the prevention of Winter Grass, Summer Grass, Crowsfoot and Crab Grass.

oxafert

Organic options

If your preference is to avoid the use of herbicides on your lawn, then there are some organic weed treatments which may work against particular weeds.

Some of these options include boiling water, salt, vinegar, cornmeal gluten and nonanoic acid – but keep in mind that these will almost always be non-selective and will harm your lawn as well, so spot treating is the way to go. Read more here.

As always, if you have any more questions please don’t hesitate to contact us for free expert advice on 1800ALLTURF (1800255873) or 07 5543 8304.

How do I make my grass grow thicker?

Feel like your grass grows quickly, but never really looks that great because it’s too sparse?

You might notice your neighbour’s lawn always looks thick and lush, but yours, even though it’s the same variety, just doesn’t quite look the same.

There are many factors that could be contributing to your lawn’s poor performance. The main culprits are shade, compaction or a pest related issue. Look as these potential issues first to rule these out as the problem. If you don’t, the underlying problem will continue to cause you headaches and you will never get the result you are looking for.

If you have ruled out shade, compaction and pests, it could simply boil down to a difference in mowing techniques. A few tweaks to the way you mow your lawn and the frequency can make all the difference.

How do I make my grass grow thicker?

Let’s start with mowing:

Regular mowing – Regular mowing promotes lateral growth. If you don’t let your lawn get too long, more sun can penetrate to encourage growth.

Mowing in different directions – If you mow in the same direction all the time, the grass tends to stay pointed in that direction. Going over your lawn in different directions will help the grass to grow straight up, leaving more room for blades to grow next to it.

Mowing short – If you mow short (not too short), your grass will learn to grow thicker with more lateral growth.  If you leave it too long, once again sun can’t penetrate as easily, and you end up with a patchy lawn, particularly when you end up cutting off more than a third of the leaf to bring the level back down.

In addition to mowing, it is important not to forget the overall health of your grass. The healthier your lawn is, the more likely it is to grow thicker and spread.

Key principles that are important to lawn health:

Fertilise – Most lawn fertilisers contain a balance of nutrients ideal for grass health. One of these nutrients is potassium. Potassium functions within the cell of the grass and provides strength to the whole plant. It helps with the internal processes, including photosynthesis, respiration and protein production creating thicker cell walls.

Water – When your lawn runs out of water and ability to draw moisture from the soil, it reaches its permanent wilting point (PWP). This is where your lawn will start to suffer, and wilt and growth will slow to an almost complete stop.

Dethatching – Excessive thatch in the turf profile makes it difficult for your lawn to take in nutrients, creates moisture loss and causes a barrier that makes it difficult for the living matter to thicken and spread.

Eliminating all weeds and invading turf species – It goes without saying really, but if there’s space in your lawn for more grass to grow, it’s likely there is space for weeds to appear as well. Hand weed what you can, spray with herbicides when required and allow your grass to spread into these areas instead.

Limit wear and unnecessary stress – Less stress will also ensure grass is in top health which will also improve density.

Plant Growth Regulators (PGR’s) – You might have heard of a treatment that will reduce the frequency you need to mow your lawn. These chemicals were designed primarily to slow vertical plant growth to reduce clippings and mowing requirements in commercial situations like on sports fields or golf courses. Energy is then redirected to the roots and towards lateral growth. The end result is a grass that is more tightly knit, thicker, and more capable of handling stress.

As always, if you have any more questions please don’t hesitate to contact us for free expert advice on 1800ALLTURF (1800255873) or 07 5543 8304.

Five Common Lawn Weeds – Identification and Treatment

Does your lawn have weeds, but you’re not sure what they are and how to remove them? We take a look at some common lawn weeds that might be growing in your lawn and look at a few different options on how you can remove them.

Cudweed

Amochaeta galviceps

Lawn Weed – Cudweed

  • Flat, shiny, mid-green leaves with a rosette shape
  • Various small flowers on stems
  • Fibrous roots
  • Control – hand removal and spot spray herbicide
  • Difficult to kill due to glossy leaves
  • May need two or more sprays.

Winter Grass

Poa annua

winter grass

  • Is a low growing weed
  • Has soft, drooping green leaves
  • Grows in tufts with white seeds
  • Will start to appear in mid to late Autumn
  • Can stick around late winter or early Spring till the temperatures warm back up
  • Control – hand removal, pre-emergent and post-emergent herbicides.

Bindii (jo-jo)

Soliva sessilis

Lawn Weeds Bindii

  • Possibly the most annoying lawn weed due to the pain caused by the seeds to bare feet
  • Finely dissected, small, fern like leaves, light green in colour
  • Flat, small compact rosettes
  • Small green flowers deep in leaf axis
  • Fine, fibrous roots
  • Small brown, flat seeds with sharp spines that hurt bare feet
  • Control – hand removal or selective Bindii herbicides in winter or early autumn before the plant sets seed
  • Easily managed if tended to early.

Creeping Oxalis

Oxalis corniculata

Lawn Weeds – Creeping Oxalis

  • Small, light green, clover like leaves on short petioles
  • Small, yellow, bell shaped flowers
  • Forms new roots wherever stems touch the ground, creeping under and through lawn
  • Thin tap-roots
  • Very difficult to remove as crown breaks off leaving roots for re-growth
  • Very invasive, nasty weed
  • Control – hand remove small plants
  • Dig out section of lawn
  • Herbicide for larger infestations.

Clover

Trifolium spp.

Lawn Weeds – Clover

  • Clover shaped, green leaves with with circular markings, on thin stems
  • Small white flowers, ball shaped on stems with leaves
  • Tap-roots off stolons
  • Is a weed in lawn but in other areas can be beneficial due to high nutritional value
  • Four leaved plants are very lucky, so don’t poison those!
  • Control – hand removal and selective herbicide.

Lawn Weed Treatment

Hand removal

Many small weeds many be carefully pulled out by hand, however you will need to make sure you have removed the roots. Using a weeding trowel or long handled, mechanical device and prizing around the roots will help ensure total removal. The bigger the weed, the bigger and stronger the roots. In some cases, a weed spray might be necessary.

Herbicides

For Cudweed, Bindii, Creeping Oxalis and Clover, you can use a broadleaf herbicide like All Purpose Weed Control or Amgrow Bin Die. These herbicides are both safe to use on Sir Walter DNA Certified Buffalo, TifTuf Hybrid Bermuda, Sir Grange Zoysia, Eureka Kikuyu, and most other lawn types.

weed control

For Winter Grass, we recommend using a selective herbicide like Amgrow Winter Grass Killer (not suitable for Kikuyu, Rye, and Fescue lawns). This will remove any Winter Grass that is currently growing. We also recommend using a pre-emergent herbicide like Oxafert when the temperatures get cooler in your area to help prevent the winter grass from returning.

As always, if you have any more questions please don’t hesitate to contact us for free expert advice on 1800ALLTURF (1800255873) or 07 5543 8304.

Why it’s Important to Aerate Your lawn

Your grass needs space below ground to take in air, nutrients, and water. Your lawns’ roots need to ‘breathe’.

Ultimately, aerating your lawn and allowing it to breathe benefits you. A healthy lawn can drop the temperature of your home’s surroundings, saving energy costs. But, aerating also helps to protect your lawn against a lot of common problems due to compaction: drainage issuesbare patchesweedsdrynessfungal diseasefairy ring …

What is aeration?

Perforation of the soil to allow air, water and nutrients to penetrate the grass roots.


Why do I need to aerate my lawn?

Aeration helps the roots grow deeply and produce a stronger, more vigorous lawn. The main reason for aerating is to alleviate soil compaction. Soil compaction limits the amount of nutrients and water to penetrate the roots of your lawn.

How do I aerate my lawn? 

A smaller area of lawn can be aerated manually with aerating sandals (sandals with spikes that aerate the lawn as you walk) or a sturdy garden fork. Simply insert the fork into the lawn and wriggle it back and forth to fracture the soil profile. Aim for a spacing between the holes of around 8 – 10cm. In order to achieve adequate aeration, you may need to go over the area twice in a different direction each time.

aerationaerating

You can hire specialised aerators if you have a large lawn. A spiked roller is also useful for lawn aeration for incorporating lime, gypsum, or coarse sand into the profile to improve drainage or pH.

Unlike regular aeration, where solid tines simply punch holes in the ground, core aeration removes a plug of soil from your lawn at the same time. You can read more about core aeration here.

should I core my lawn
PULLING CORES FROM YOUR LAWN CAN BE BENEFICIAL TO INCREASE OXYGEN, NUTRIENT AND WATER PENETRATION TO THE ROOTS OF YOUR LAWN.

How often should I aerate my lawn? 

Different soil types require more frequent aeration. Clay soil compacts easily and should be aerated at least once a year. You can aerate a sandy lawn once a year, or once every two years. In harsher climates, aerating twice a year will encourage turf growth and health.

In areas where there is a high amount of foot traffic, pets or even cars on the lawn, compaction is a common problem. Regular aerating will be important to ensure the ground doesn’t become too hard and help the soil to breathe and the grass to spread.

When should I aerate?

The best time to aerate warm season grasses, such as soft-leaf buffalo, couch, kikuyu and zoysia is during spring and summer while they are actively growing. You can aerate at any time of the year, but if you do so in the cooler months just keep in mind the grass won’t cover over the aerated holes as it is dormant. Always try to aerate at the same time you are fertilising or performing any other major lawn care operation such as dethatching and top dressing. It is also a fantastic time for aeration after rainfall, as it will make this process much easier.

For cool season lawns, such as fescue and rye grass, the same principle applies. With proper care and a lot of water, cool season lawns can grow all year (with the exception of very cold climates) so you can aerate all year round. Again, keep in mind the absolute best times are when you fertilise or perform any other lawn care and following rainfall, so soil moisture levels are high.

Aerating is often overlooked, but its importance in allowing air, water and nutrients to get into the soil cannot be overstated.

After aerating in spring is a perfect time to fertilise your lawn.

Lawn Solutions Premium Fertiliser

lawn fertiliser

Test your pH 

After aerating, it is a good time to test your pH and take action if required. pH affects your lawns ability to absorb the minerals and nutrients needed, in order to thrive. A pH that’s less than ideal can mean your lawn isn’t absorbing the minerals and nutrients it needs.

The ideal pH range for your lawn is somewhere between 6 and 7. You can purchase a pH testing kit here at the Lawn Care Store.

If your pH is not where you need it, now is also the time to apply soil additives and conditioners to improve your soil type. A few additives and conditioners are listed below. For the best advice talk to your local Lawn Solutions Centre or closest Lawn Solutions Australia Turf Grower for specialised knowledge.

PH Testing Lime for Healthy Lawns

Tips to improve your soil type:

  • Lime (calcium carbonate) helps raise pH and neutralise acidic soil.
  • Gypsum is calcium sulfate dihydrate and helps break down clay soils.
  • Fertiliser – Because aerating allows nutrients to better penetrate, straight after aerating is a perfect time to fertilise your lawn as well.

As always, if you have any more questions please don’t hesitate to contact us for free expert advice on 1800ALLTURF (1800255873) or 07 5543 8304.

Attracting Native Birds to Your Garden

Native birds are an important part of many ecosystems, pollinating plants, seed dispersal, and insect and rodent control. By attracting more native birds to your lawn, you will help keep your local ecosystem balanced. But how can you attract these native birds to your garden?

Birds native to each region

In different regions you can expect to see different types of native birds.

In Sydney, some native birds you can see outside the city include Nankeen kestrel, Superb fairy-wren, Rainbow lorikeet, Red wattlebird and more.

Native birds you can encounter in Melbourne include White-plumed honeyeater, Bell miner, Eastern rosella, and more.

For more information on what nativebirds you can find in your backyard, check out the Australian Museum page here.

Plant native plants around your lawn

Using a variety of native plants in your garden will help create a comfortable environment to attract native birds to your area. When planting to attract birds, we recommend using a variety of low lying and medium size shrubs and high trees. By using a variety of plants, you will provide more options for all bird sizes on your area.

Low growing plants will help attract many smaller native birds like Wrens and Finches and members of the Honeyeater family.

Medium shrubs provide a safe place for many smaller birds as they can provide a place to hide from danger.

If space allows high trees provide a high vantage point for birds allowing them to feel safe as they can see their surroundings and food sources.

Different native plant options include Grevilleas, Bottlebrush, Banksias and Gum Trees.

Some native plants are better suited to different regions of Australia, so it is best to chat with your local nursery to see which plants are suited to your region.

Bird baths and water features

Birds are attracted to areas with water. Bird baths as the name suggests provide a place to bathe and drink and socialise. Bird baths are best placed near surrounding trees and shrubs and placed off the ground. This will help them feel safer with their surroundings. It is also best to add a few rocks or sticks in the middle of the bird bath to help make it easier for smaller birds to use. Keep your bird bath clean with fresh water will help make it a more attractive place for birds to stop

Did you know that birds are also attracted to running water? The sound of moving water can attract birds to stop and drink, rest and bathe. If your budget allows, it can be a great feature for us to enjoy and the birds too!

Nesting boxes and nesting material

If you have large trees in your garden, you might want to try adding nesting boxes! These will provide a space for birds and other animals to live, rest and take refuge. You can buy nesting boxes from a local garden or hardware store or even build your own!

We also recommend leaving out nesting material like sticks, grass clippings and fallen leaves for birds to use.

As always, if you have any more questions please don’t hesitate to contact us for free expert advice on 1800ALLTURF (1800255873) or 07 5543 8304.

How to Fix Tyre Marks in Lawns

Do you have unattractive tyre marks in your lawn? In this blog, we look at a few methods you can use to help repair these, plus tips on how to avoid ruts from occurring.

What causes tyre marks or ruts?

Ruts can occur when objects like cars, motorbikes and even the kids’ bikes move over grass with saturated soil. When this happens, the soil can often sink and become compacted, creating divots.

Assessing the damage

The first step is to assess the damage. Are the ruts only shallow (up to 10 cm deep) or deep (over 10cm deep)? After you have determined this, we can look at the best way to repair it.

Small ruts

Small ruts up to 10cm deep can be fixed by loosening up the soil base below the lawn.

To do this, use a garden fork and insert it underneath the rut. Then pull the fork down, lifting the turf back up. It is best to lift the affected turf a few cm above the unaffected turf so it can level out over the coming days. Continue to do this around the affected area.

Big ruts

For larger ruts there are a few extra simple steps to follow.

Firstly, use a spade to cut 3 sides along the rut. Then lift and fold the grass over so you can access to the soil underneath the rut. Then use a garden fork or your spade to loosen up the soil underneath. If your soil is not level after this, bring in some sandy loam or turf underlay to bring the soils level back up. Then you can fold your turf back onto the soil and let it grow back in

If the turf in the rut is badly damaged, you may want to look at using a few turf rolls from your local turf supplier. When doing this, it is best to use the same variety as your existing lawn. Cut the turf to the required size and lay it over the prepared soil.

After repairing your rut, it is important to keep traffic in the affected area to a minimum while the grass is repairing itself and irrigate regularly. In winter, most warm season grasses like buffalo, couch, kikuyu and zoysia will need the warmer temperatures in spring to start repairing. In spring, you can also give these areas a fertilise to help promote extra growth.

How to avoid ruts in your lawn

The easy answer, stop people driving and parking on your lawn.

Roping off your area is an easy way to help stop others driving on your lawn. You can place small stakes into your grass and tie rope to them. This will act as a small reminder to others to not drive on your lawn.

Another option is to add a sign on your lawn to keep off the grass. Like this one available at Bunnings.

As always, if you have any more questions please don’t hesitate to contact us for free expert advice on 1800ALLTURF (1800255873) or 07 5543 8304.

How to Back Lap a Cylinder Mower

If you have a cylinder mower, a sharp reel is important to ensure a nice clean cut to your grass. But, do you know how to Back Lap a Cylinder mower? This blog looks at how to sharpen the blades on a cylinder mower.

What is back lapping?

If your reel and bedknife are not working as they should, your grass blades will be torn rather than cut. This isn’t great for the appearance of your lawn and is also not ideal for plant health.

Back lapping is the process of maintaining the sharpness of your cutting cylinder blades. This helps to ensure your reel and bedknife are bedded together and cut evenly, providing a sharp and even cut. Once the cylinder edge has been lost, you will need to have the cylinder re-ground.

Before you undertake the following back lapping process, it’s extremely important that you handle the machine safely and wear suitable protective equipment. Make sure you are wearing gloves, you are not wearing any bagging clothing, particularly long sleeves, and have a safe working area clear of clutter and away from others.

cylinder mowers

Step 1 –

The first thing you want to do is make sure that the machine won’t function. Turn the on/off switch to off and for extra safety remove the spark plug.

Step 2 –

Tip the cylinder mower backwards so that the reel and bedknife are easily accessible.

Step 3 –

Use a Mill Bastard file to take the round edge off the bed knife. As you do so, move the cylinder reel away from the pinch point. Using the file to put a sharp cutting edge on the leading edge of the bedknife.

Step 4 –

Use a cordless drill or back lapping machine and socket to turn the cylinder reel backwards.

While it is spinning, wet down the reel and bedknife lightly with water. A spray bottle will make this easier to get a nice even coverage of water across all elements.

Step 5 –

Next, apply back lapping compound or paste. This paste is a water-soluble grinding paste designed specifically for sharpening blades.

Apply back lapping compound evenly using a small to medium-sized paintbrush with a long handle while the reel is spinning. Using a piece of PVC pipe over the handle can help extend the length of the handle so your hands are kept at a distance from the blades.

The brushes only need to flick the reel blades as they spin lightly brushing as it goes around. Do not allow the brush to enter too far into the cylinder.

Important note: It is extremely important you are paying full attention while doing this and keep your hand as far away from the spinning reel as possible.

It is suggested to allow the cylinder to spin backwards after applying the grind paste for 5 minutes.

Step 6 –

Once the blades have been coated, wash off the paste using a hose.

Step 7 –

Adjust the cylinder position evenly to the bedknife, ensuring both sides and just touching the bedknife and the cylinder is spinning smoothly and not too tight.

Make sure the cylinder adjustment lock nuts and loosen prior to adjusting.

Step 8 –

Check with paper for sharpness. Checking cutting cleanly right across all the reel blades. The paper should cut easily like it would when using sharp scissors.

Once you have completed this process spray your cylinder, bedknife and other moving parts with WD40 or a lanolin spray like Inox to stop corrosion and rust. 

Now you know how to Back Lap your Cylinder Mower. You should now have your cylinder perfectly balanced, sharp, and ready perfectly cut your lawn.

For more lawn care tips and advice, check out our other lawn care blogs here.

As always, if you have any more questions please don’t hesitate to contact us for free expert advice on 1800ALLTURF (1800255873) or 07 5543 8304.