How to lay turf on existing grass?

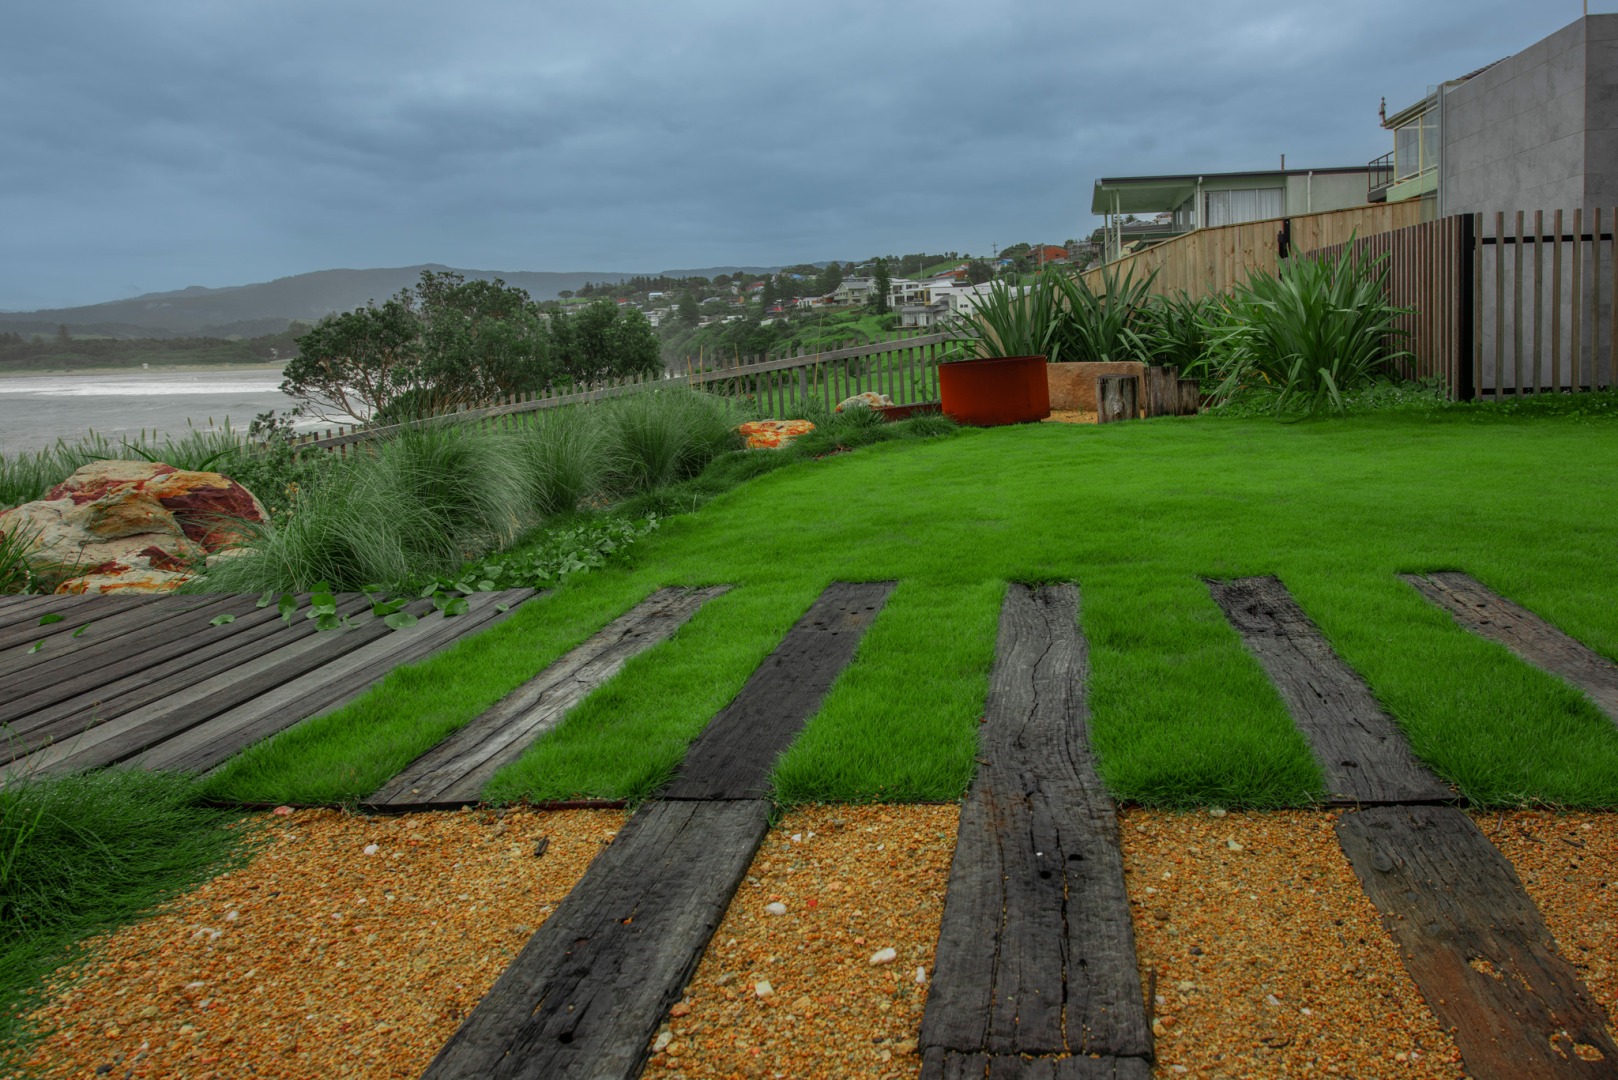
Whilst laying new turf onto existing grass is possible, it is not recommended as this will lead to issues in the long run and here’s why!

What to consider when laying new turf over old grass!

Laying your new turf on top of an existing lawn can be detrimental to the establishment of your new turf. Here’s some points as to why!

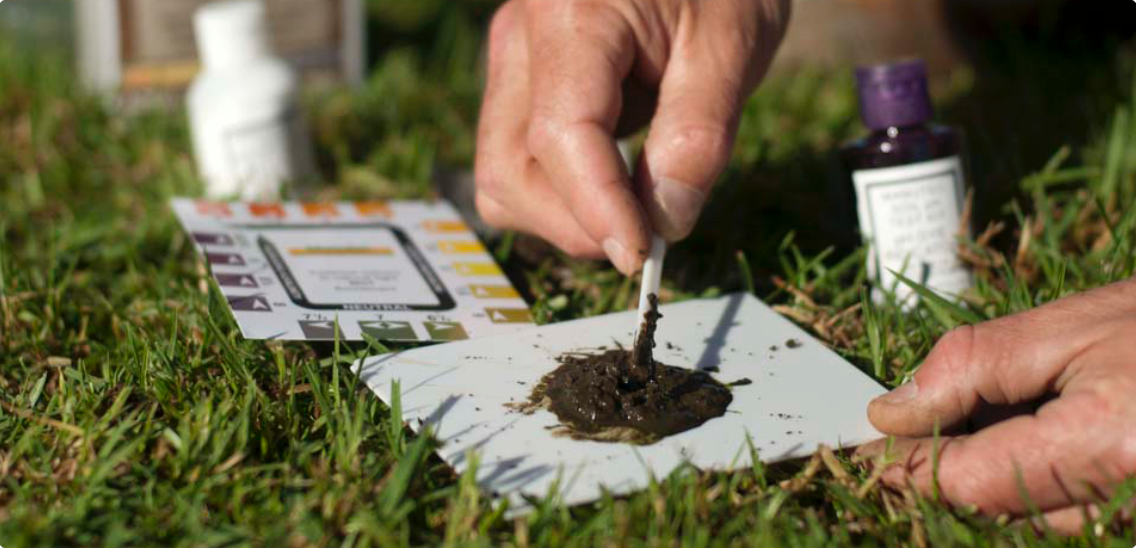
  1. Turf requires at least 50-100mm of friable good quality topsoil to grow its roots into. Laying new turf onto your existing soil can be okay but you may need to complete a Ph test to ensure your soil quality is good or you may need to enhance existing soil.
  2. Laying new turf on top of existing lawn and weeds can cause them to grow up and through your new turf. This will cause contamination to your new turf and be an up hill battle to get clean.
  3. Your newly laid turf could shallow root, causing it to dry out quickly in hot and dry weather.

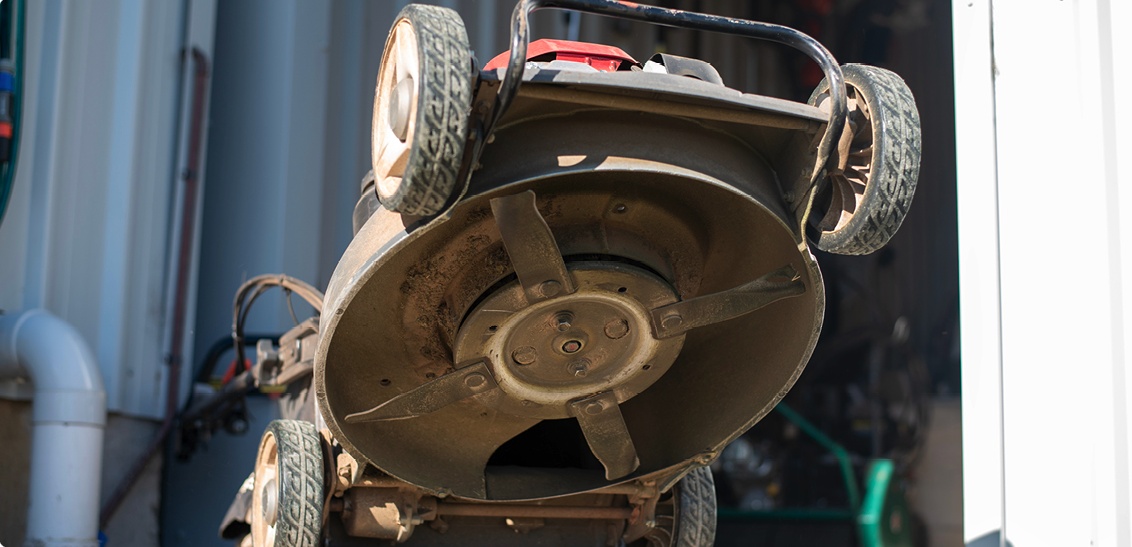
What’s Wrong With Your Existing Turf?

Let’s give you a burst of knowledge to see if you can identify what’s wrong with your existing lawn!
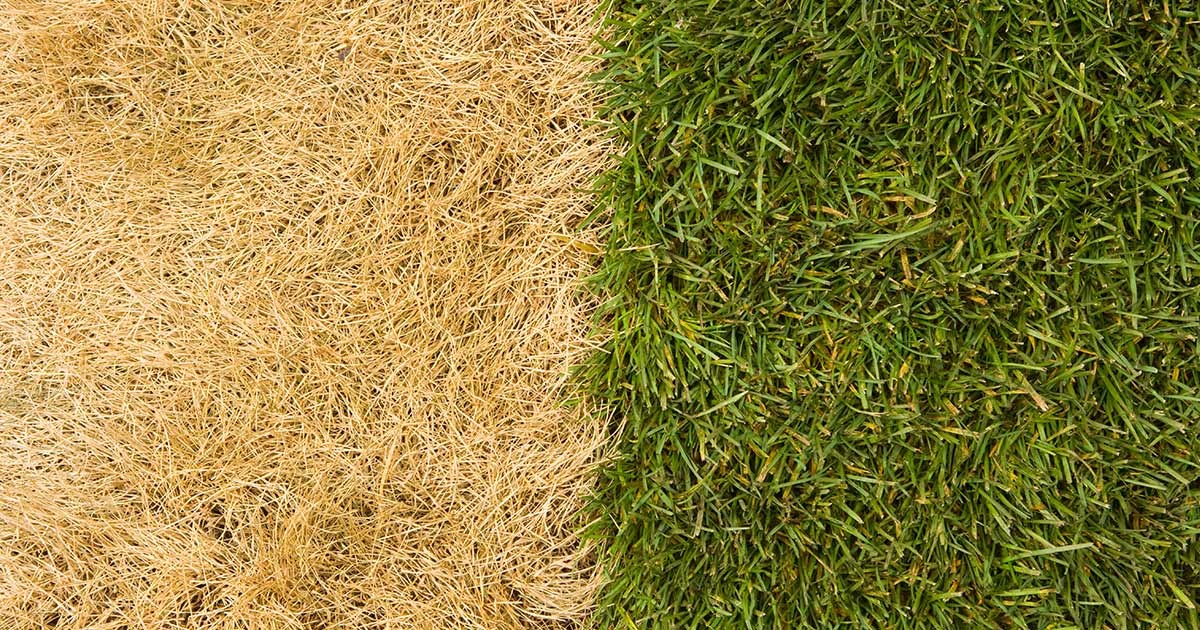
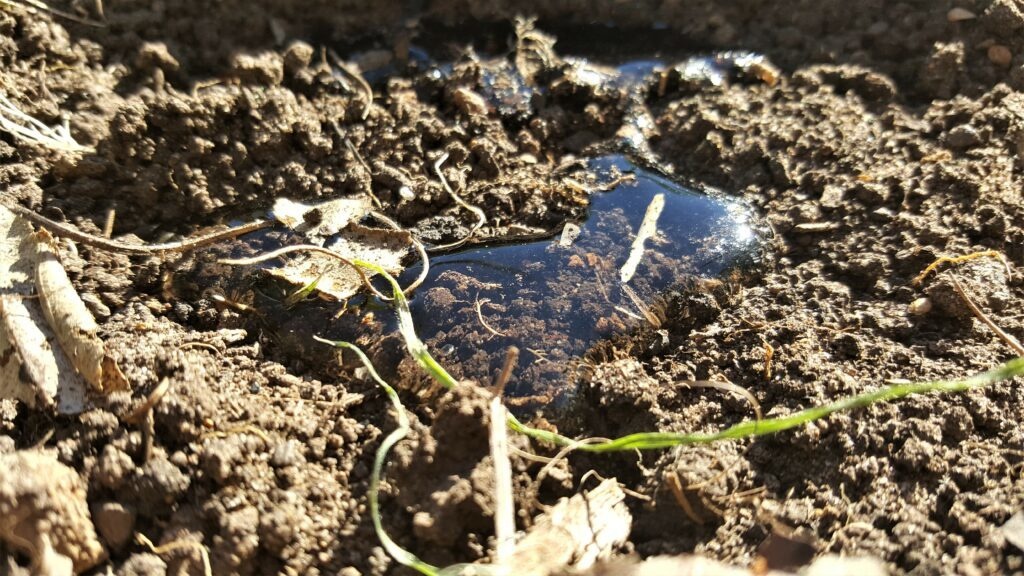
Hydrophobic Soil

If your lawn is suffering from dry patches or is hydrophobic a wetting may be needed to lay turf.

Hydrophobic lawns will pool water at the soil’s surface and will struggle to let the moisture soak down into the soil base. Dry patches or heat stressed turf can present in patches rather than across the whole lawn.

Wetting agents are best applied when the temperatures are cooler, either in the morning or afternoon. Repeated applications can be made every few months on an as needed basis.

A great product to use to help with Hydrophobic Soil is Lawn Soaker.
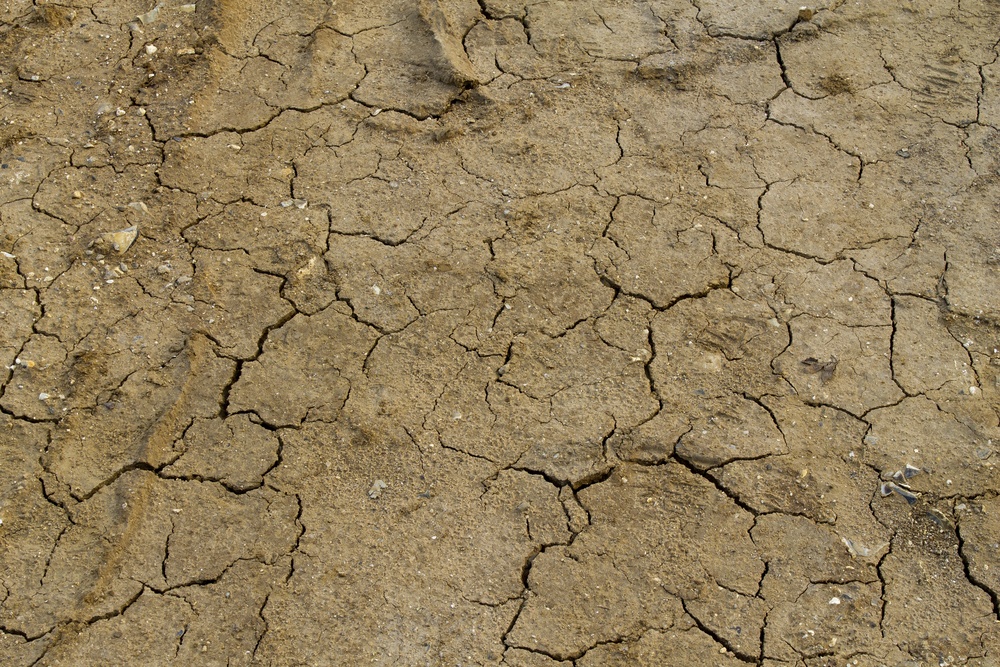
Water beading off soil

Compacted Soil

Soil compaction can occur as a result from high foot traffic in an area, from kids or pets, or in other frequently used areas. Heavier clay soils are very tight and bind together making compaction a common problem.

When compaction occurs, it can hinder the lawns’ ability to grow deeper into the soil. It can limit the amount of nutrients and water that can reach the root of your lawn.

To help alleviate heavily compacted areas aerate with a garden fork, aerating sandals or a tyne aerator.
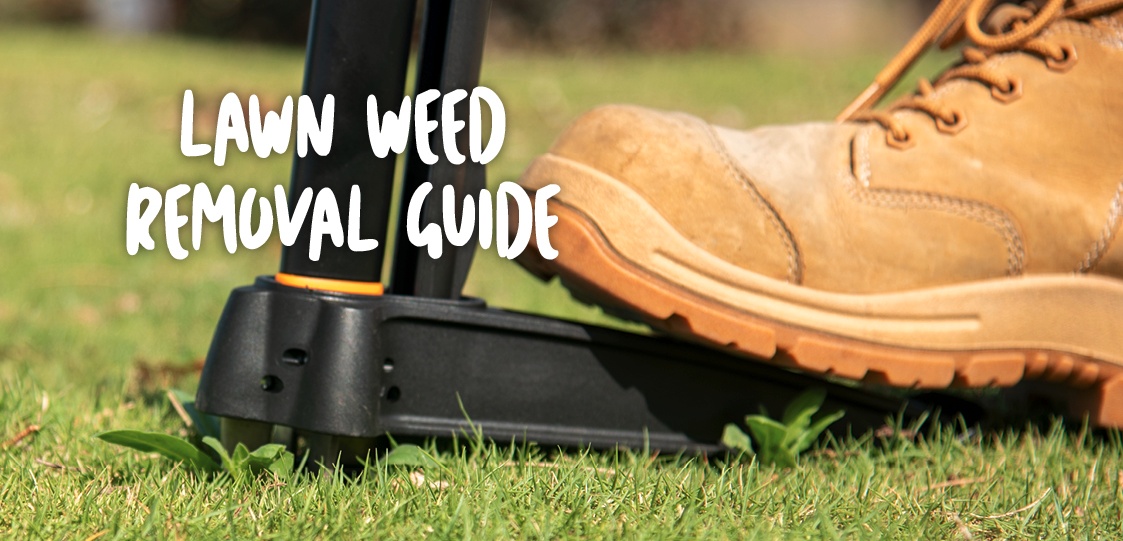
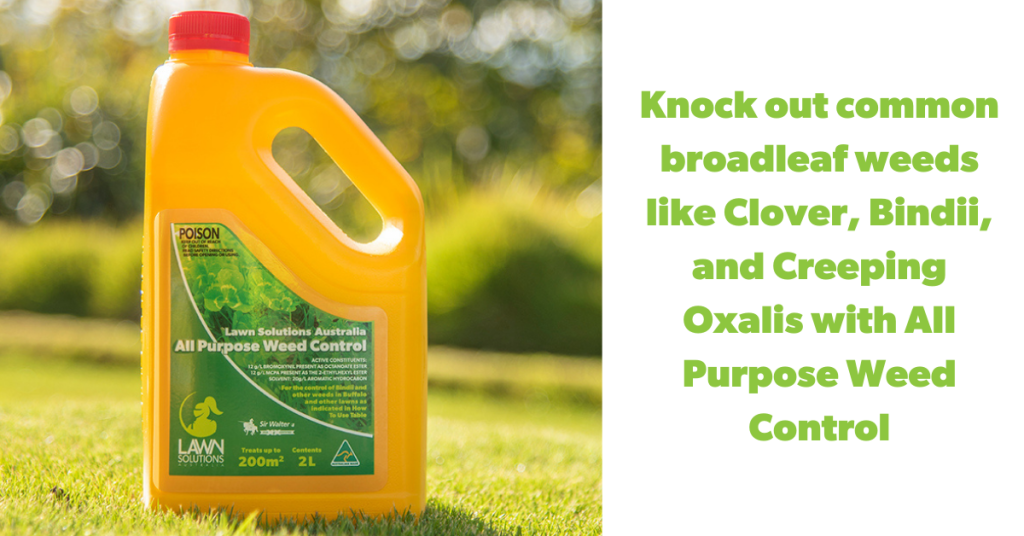
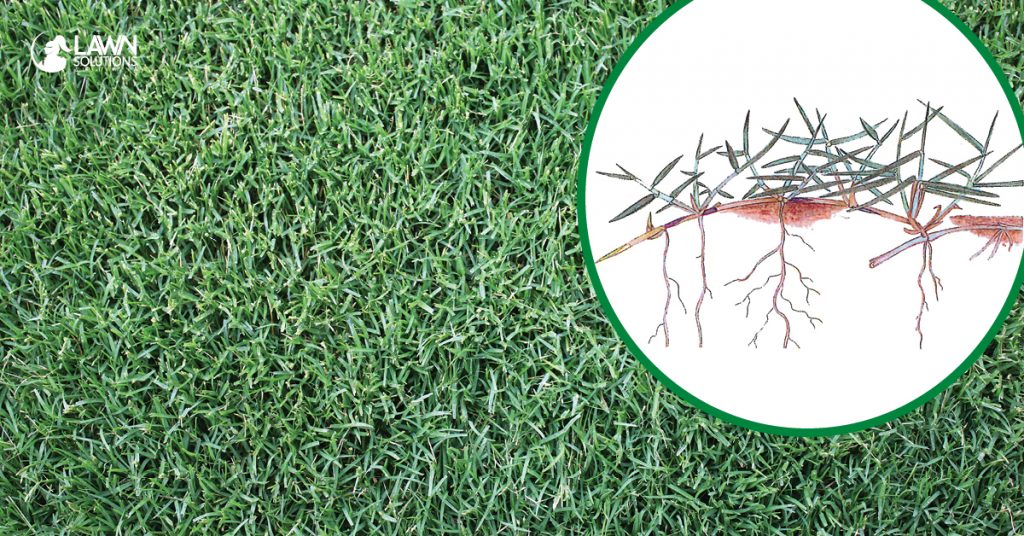
Dry compacted soil

Weeds

If you mow your lawn correctly and frequently, you should manage to avoid the invasion of most pesky weeds. But if you have found that some of these undesirable weeds are in your lawn, then there is a few methods for weed removal.

Here’s some options of weed removal:

  • Hand Removal
  • Post-emergent Herbicide (Weed Killer)
  • Pre-emergent Herbicide
  • Organic Options

To read more view the Lawn Weed Removal Guide here.
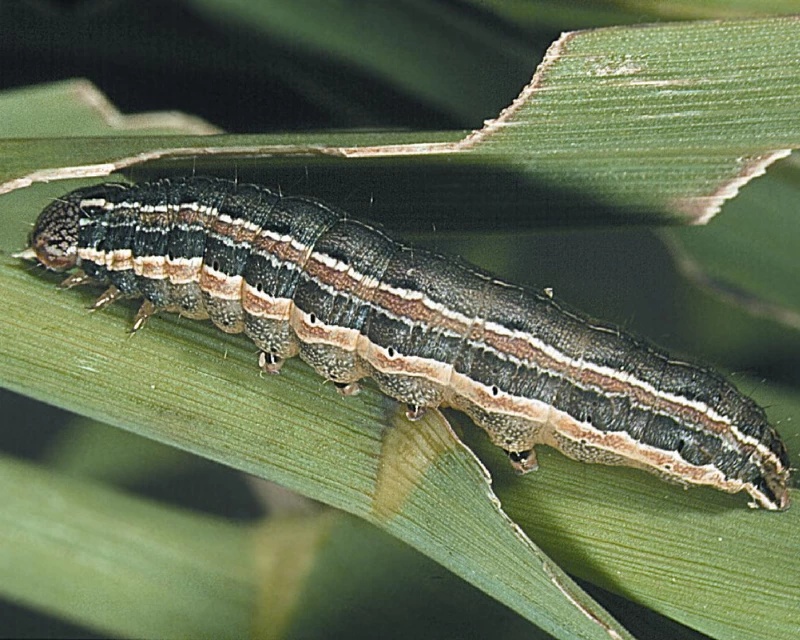
Pests

There are three types of lawn grub that eat the leaf of lawns in South East Queensland. These are; Army Worm, Sod Web Worm and Cut Worm. These are all larvae of small moths that are active from spring to autumn but are more common in the wetter months from December to May. Lawn grubs prefer healthy, lush turfgrass, so be on guard during this time.

Treatments include:

Lawn grub on lawn

Humps & Hollows

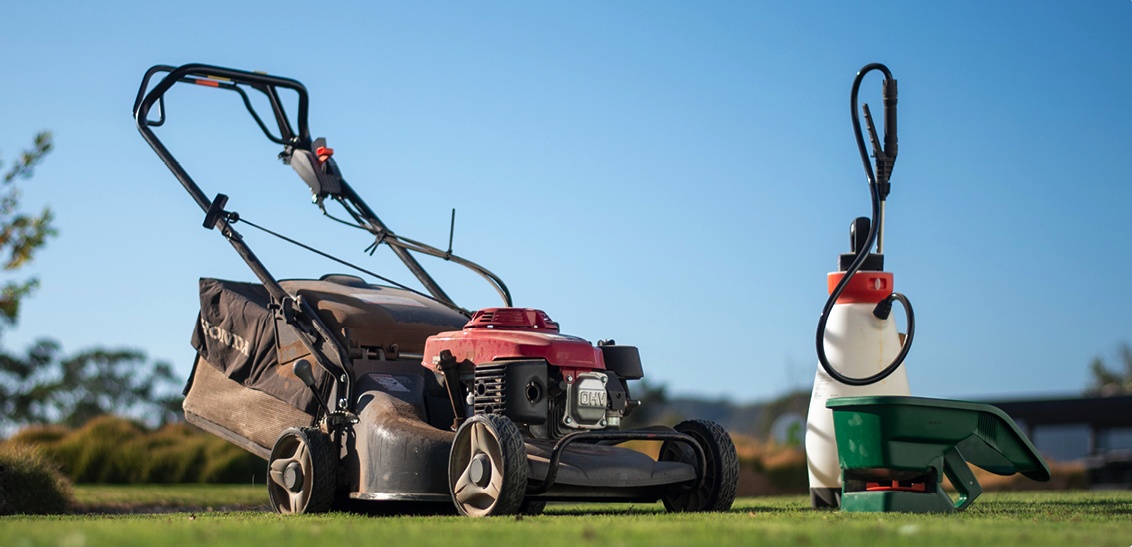
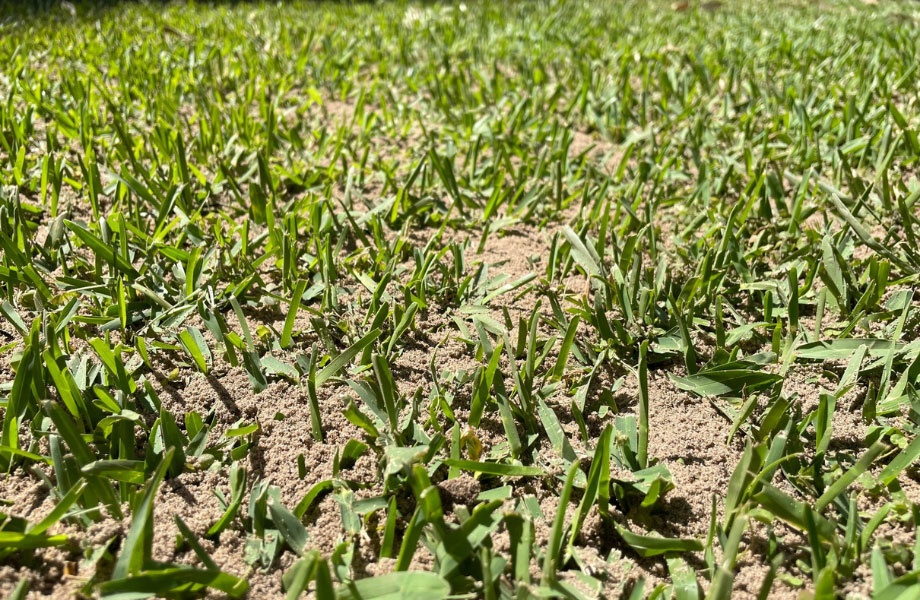
In most cases top dressing is done to correct poor preparation and lack of soil underneath or to fill in low spots and correct uneven areas in the lawn. If your lawn is well fertilised, healthy and even, then you don’t need to worry about top dressing.

Top dressing brings many benefits to a lawn that is looking a little lacklustre, including helping to reduce the accumulation of dead grass clippings and stems, known as ‘thatch’. It helps to increase nutrient retention, improves drainage, and increases disease and pest resistance.

Topdressing to Improve Levels

For top-dressing material for level improvement, we always like to use washed or screened sand. It doesn’t compact quite as hard as brickies sand. It is generally easier to screed and level due to the lower clay and silt content and reduces the likelihood of the surface crusting and becoming hydrophobic.

Top Dressing for Nutrients

This type of top dressing application places a thin layer of organic soil mixture over the area of your lawn and adds organic, natural nutrients and minerals. You would apply a top dressing for nutrients if your lawn is in need of a boost as it will encourage the production of new grass shoots and result in a thicker lawn with the added benefit of then hindering moss and weed infestations.

Applying a top dressing will introduce materials to your soil that will improve drainage, allow the soil to exchange gases with the atmosphere more effectively while also promoting the development of the soil’s micro-flora and micro-fauna needed to break down thatch and grass clippings. Top dressing matter will feed the earthworms too, releasing nutrients into the soil.

An added bonus is that top dressing allows the soil to retain moisture better during drier conditions as well as allowing excess moisture to drain away during heavy rainfall.

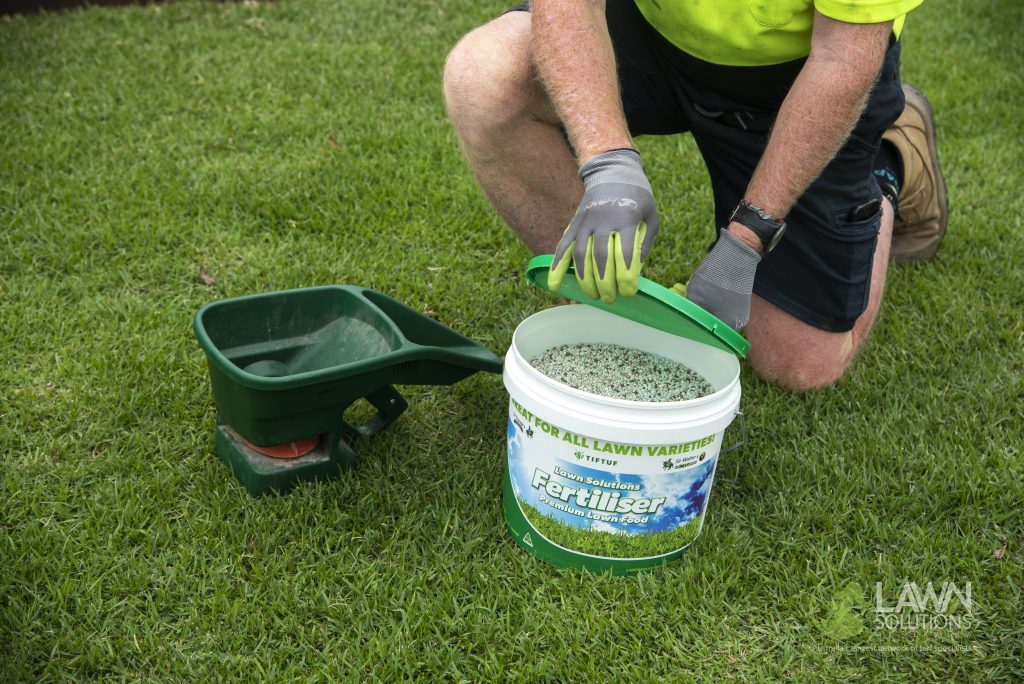
Bags of top dressing mixtures are readily available from turf lawn care centres and nurseries and provide all the relevant handling and application information. Work out the size of your lawn before you buy; as a general guide a 2kg bag will be enough to top dress a square metre of lawn.

Mow your lawn the day before applying the top dressing and rake up and remove any debris to allow the nutrients to effectively penetrate into the soil. Firstly shovel the top dressing into even piles around the area of lawn and then rake the mixture into the lawn until it looks as if the lawn has been lightly dusted and the tops of the lawn plants are above the dressing. Rake in a figure eight motion so that the top dressing mixture is spread evenly. Hose the lawn thoroughly so that the dressing is barely visible.

Lawn freshly top dressed

Diseases

Controlling diseases in your lawn! Purchase our broad spectrum fungicide Mancozeb to help treat most lawn diseases.
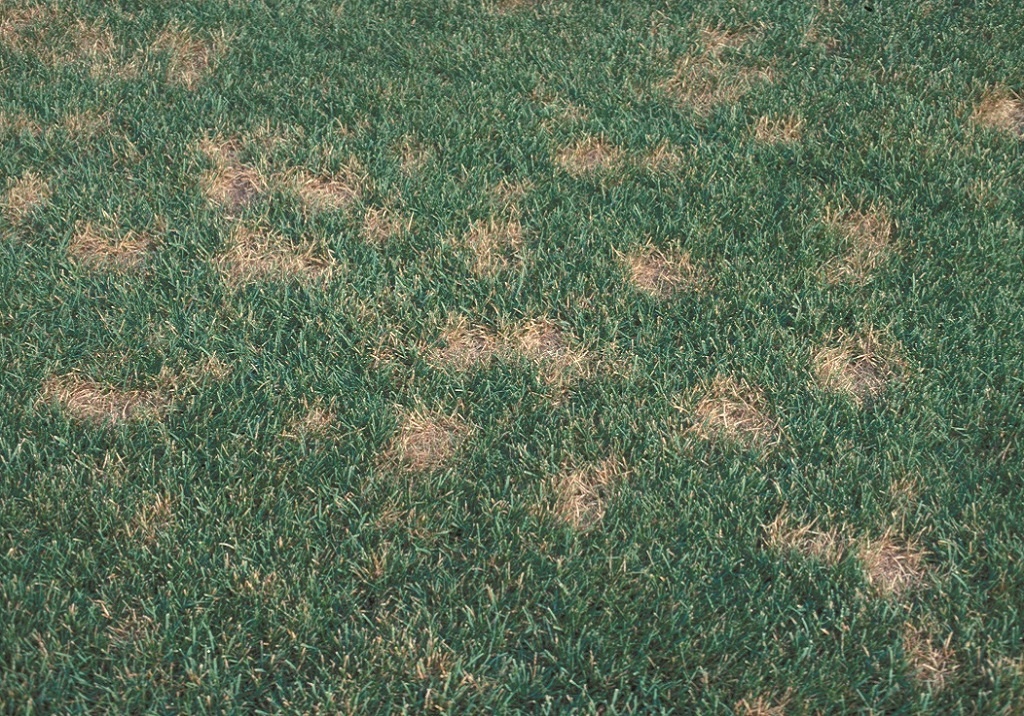
Anthracnose

Anthracnose diseases are common and destructive problems in golf course putting greens established with creeping bentgrass or annual bluegrass. Anthracnose may develop as a foliar blight, in which the turf grass leaves are infected, or a basal rot, which attacks the leaf sheaths, crowns, and stolons of the plant.
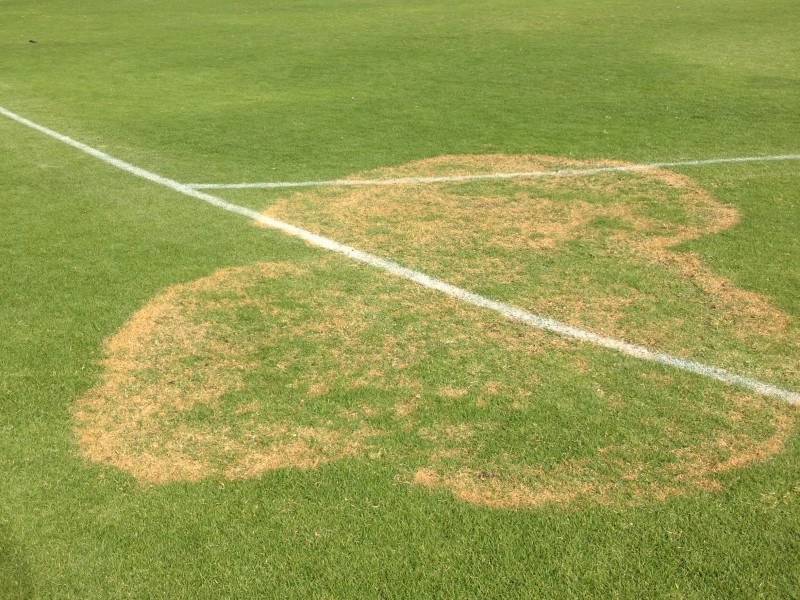
Anthracnose diseases

Brown Patch

The causal pothogen of Brown Patch is Rhizoctonia solani. Rhizoctonia solani is a soil borne fungus which can be found in most soils and is known as a cause of disease in both established and seedling turfgrasses. The disease does not produce spores, but instead spreads rapidly by mycelial contact. The disease is disseminated via movement of sclerotia which are produced and remain in thatch material.
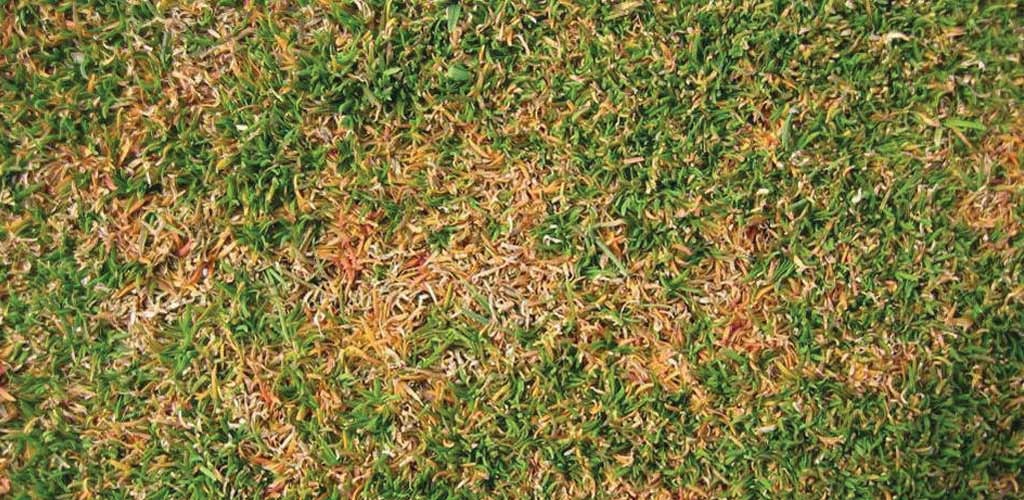
Brown patch on lawn

Dollar Spot

Dollar Spot is a turf disease that effects many different turf varieties. As its name suggests, the appearance of this disease is identifiable as dollar sized spots of discoloured grass appearing within your lawn. Up close, the discoloured leaves will have straw-coloured lesions with red/brown edges to them. If left to spread the spots will get larger and form bigger patches of affected grass.
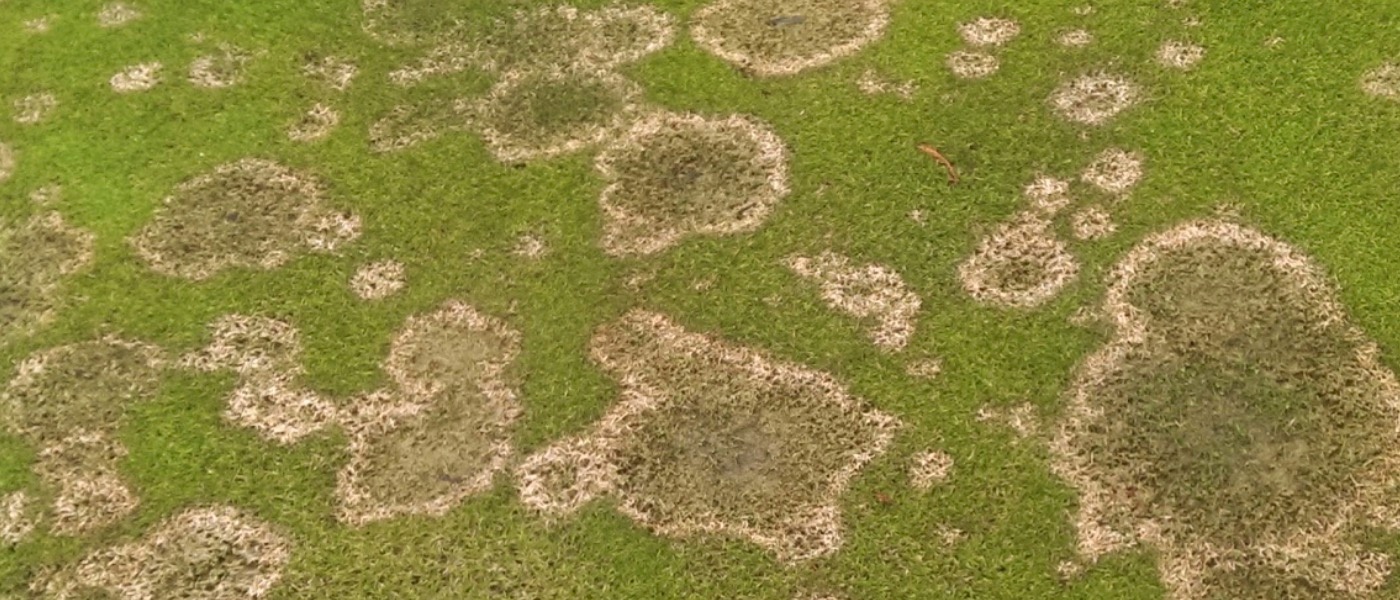
Dollar spot disease on lawn

Fusarium

Fusarium patch is a type of fungal disease in turf caused by Microdochium nivale. Fusarium patch appears as circular, water-soaked spots, usually 5cm in diameter.

Fusarium patch is a type of fungal disease

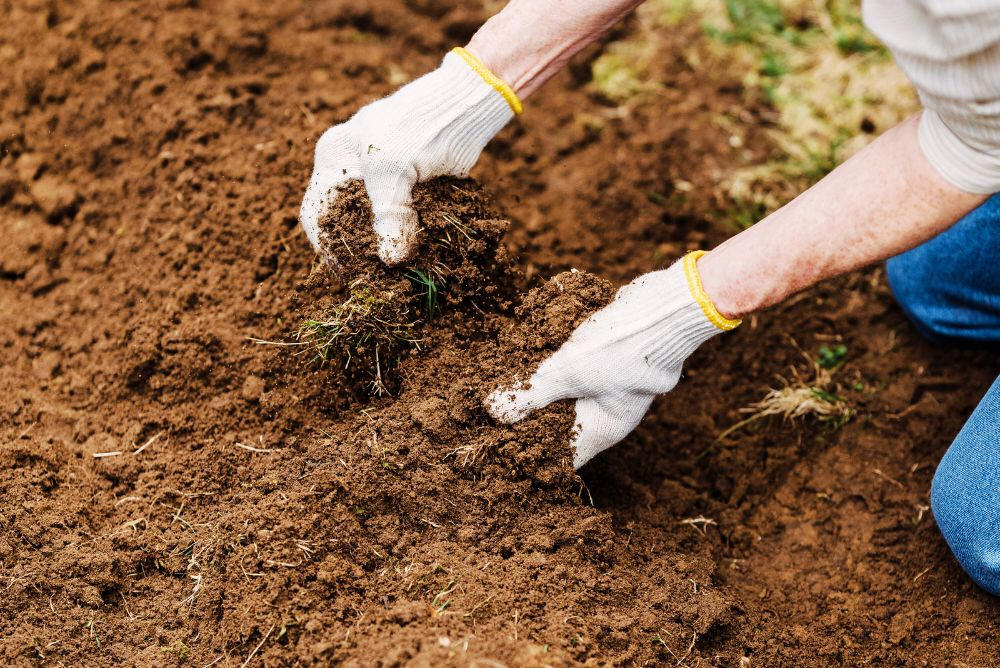
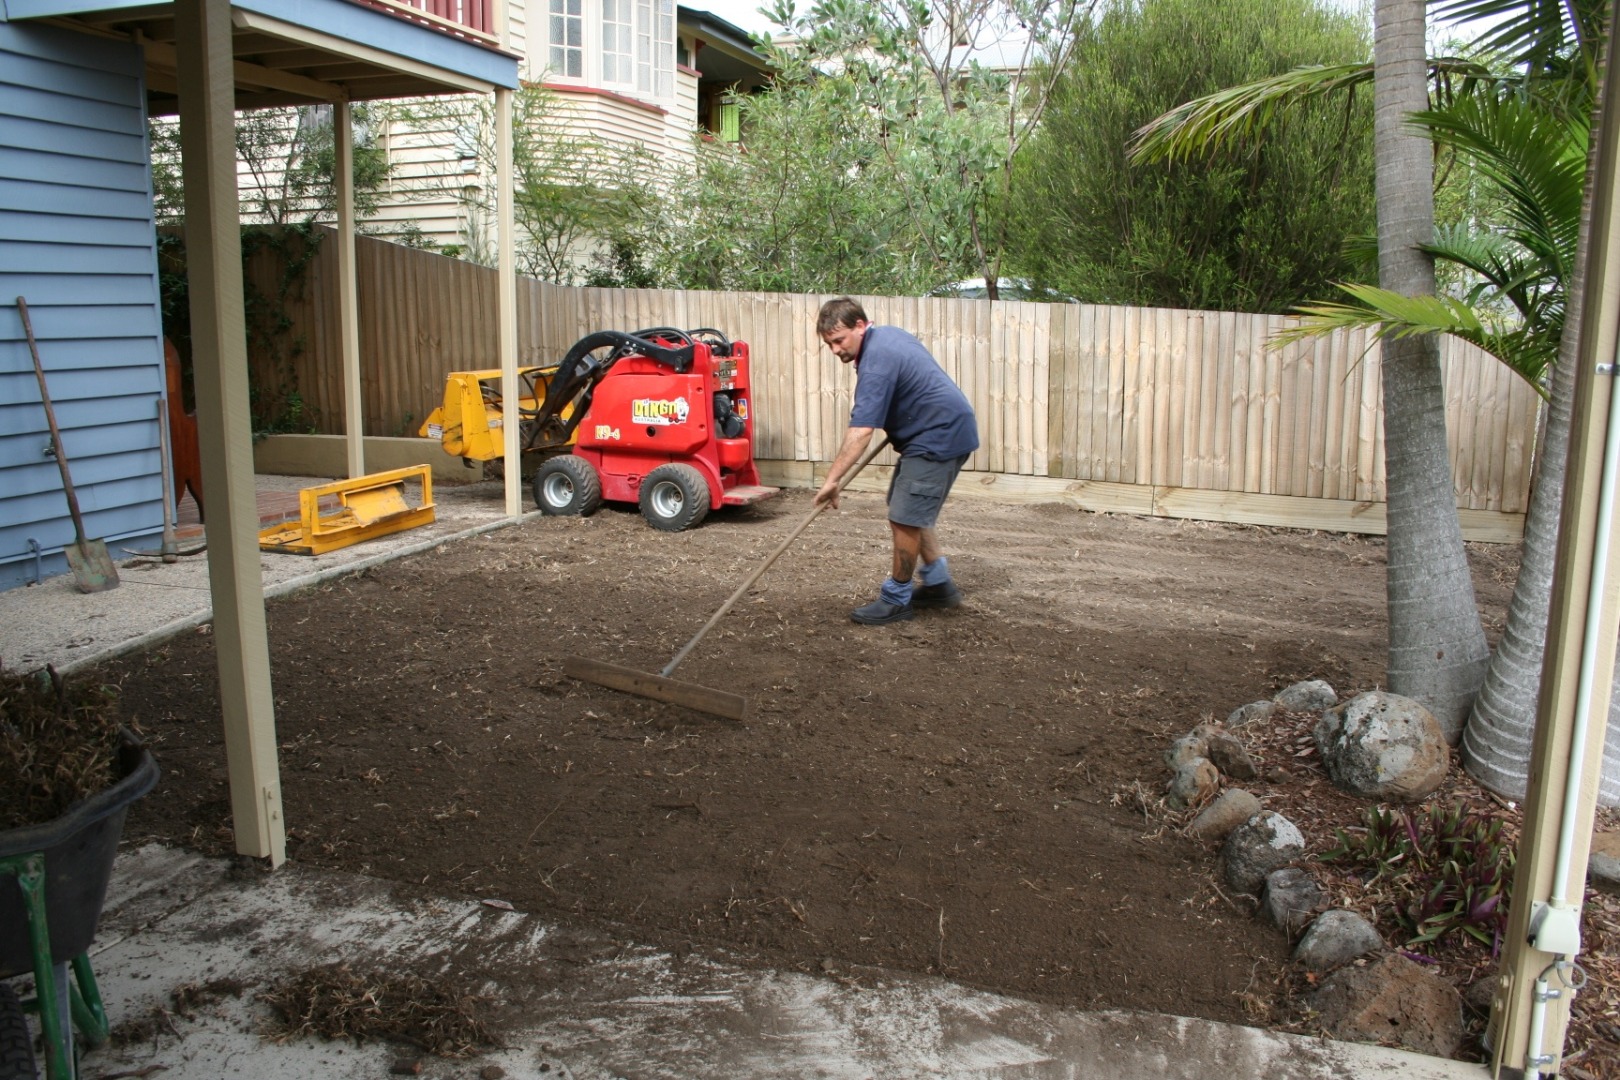
Getting the proper soil preparation

  1. To prepare your soil for turf spray out any existing vegetation with Glyphosate. Please ensure to follow the labeled rates to allow for a total kill. Allow a minimum of two days for the chemical to work on the plant. A second application may be required.
  2. Remove any existing grass and weeds or cultivate/rotary hoe this into the existing soil base.

TIP:

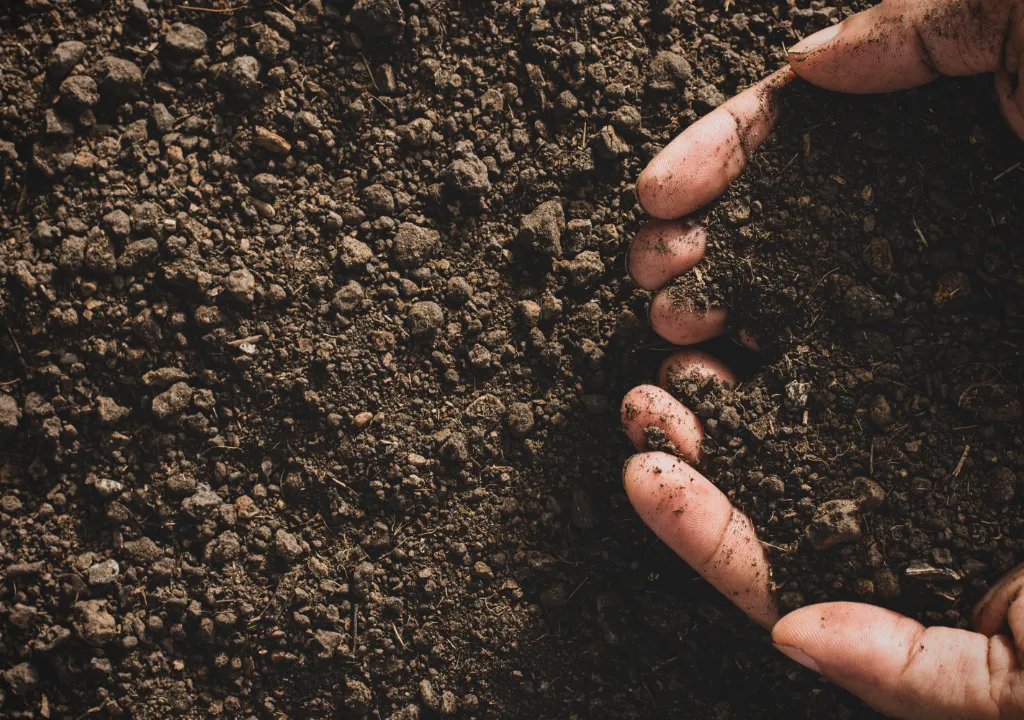
  • For best results, cultivate, till or spade the area to a depth of approximately 150mm. This would be an ideal time to add in organic matter or soil amendments that may have been required from your earlier pH test.
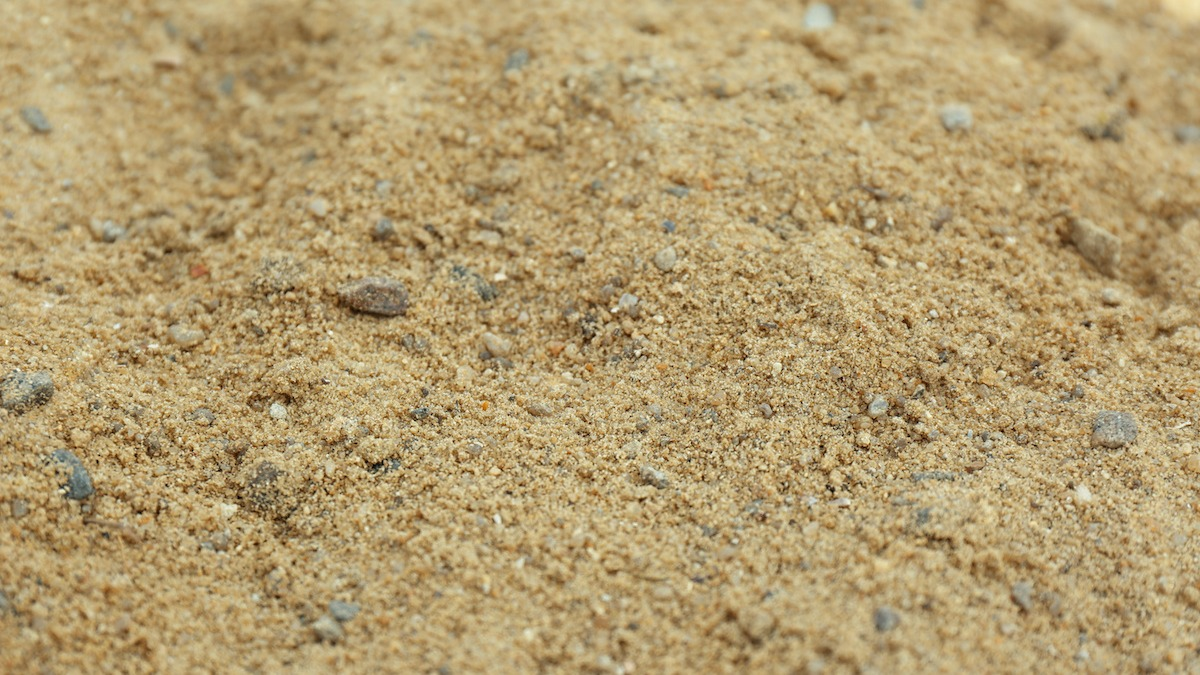
  1. Add in any turf underlay (sandy loam) required to make sure you have the best base for your new lawn. Always be sure to double-check your pH levels to ensure it is still within the appropriate range of 5.5 to 7.
  2. Eliminate any drainage problems by having the soil slope away from foundations, footpaths, garden beds etc.
  3. Rake and smooth the soil removing any rocks, roots or large clods.
  4. Roll the area with a lawn roller this will help firm the soil and reveal low areas that need more turf underlay soil.
  5. Keep the grade 20-25mm below sidewalks and driveways for the turf to sit into.
  6. Screen off the soil to provide a smooth surface, roll then screen again. Your soil needs to be compacted enough that when you walk on it you only leave a small footprint.
  7. Lightly wet the soil to minimise dust and provide a moist base for your turf, but not too wet that it turns to mud.

Professional preparing soil for new turf

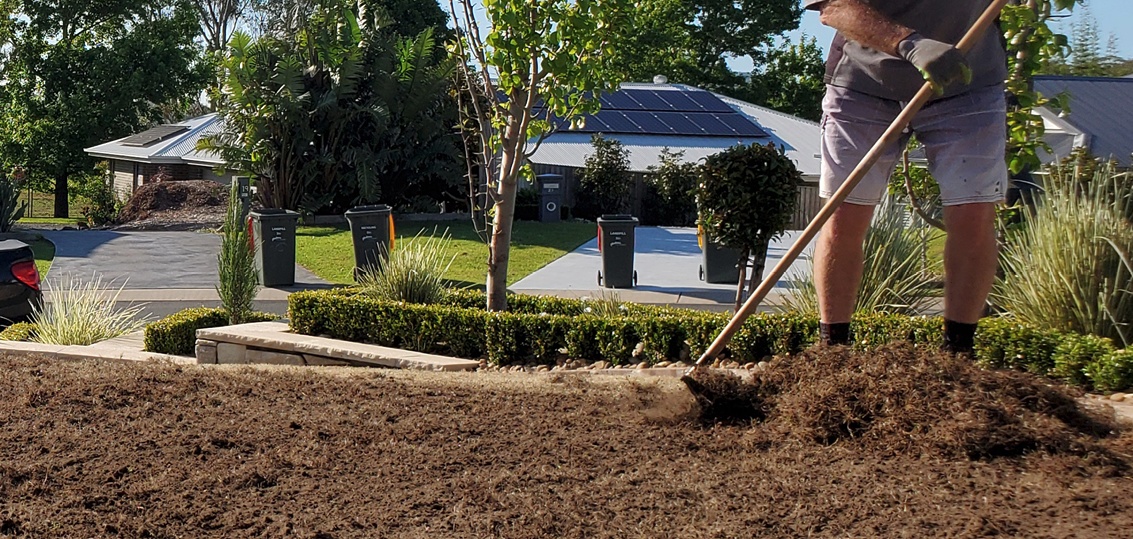
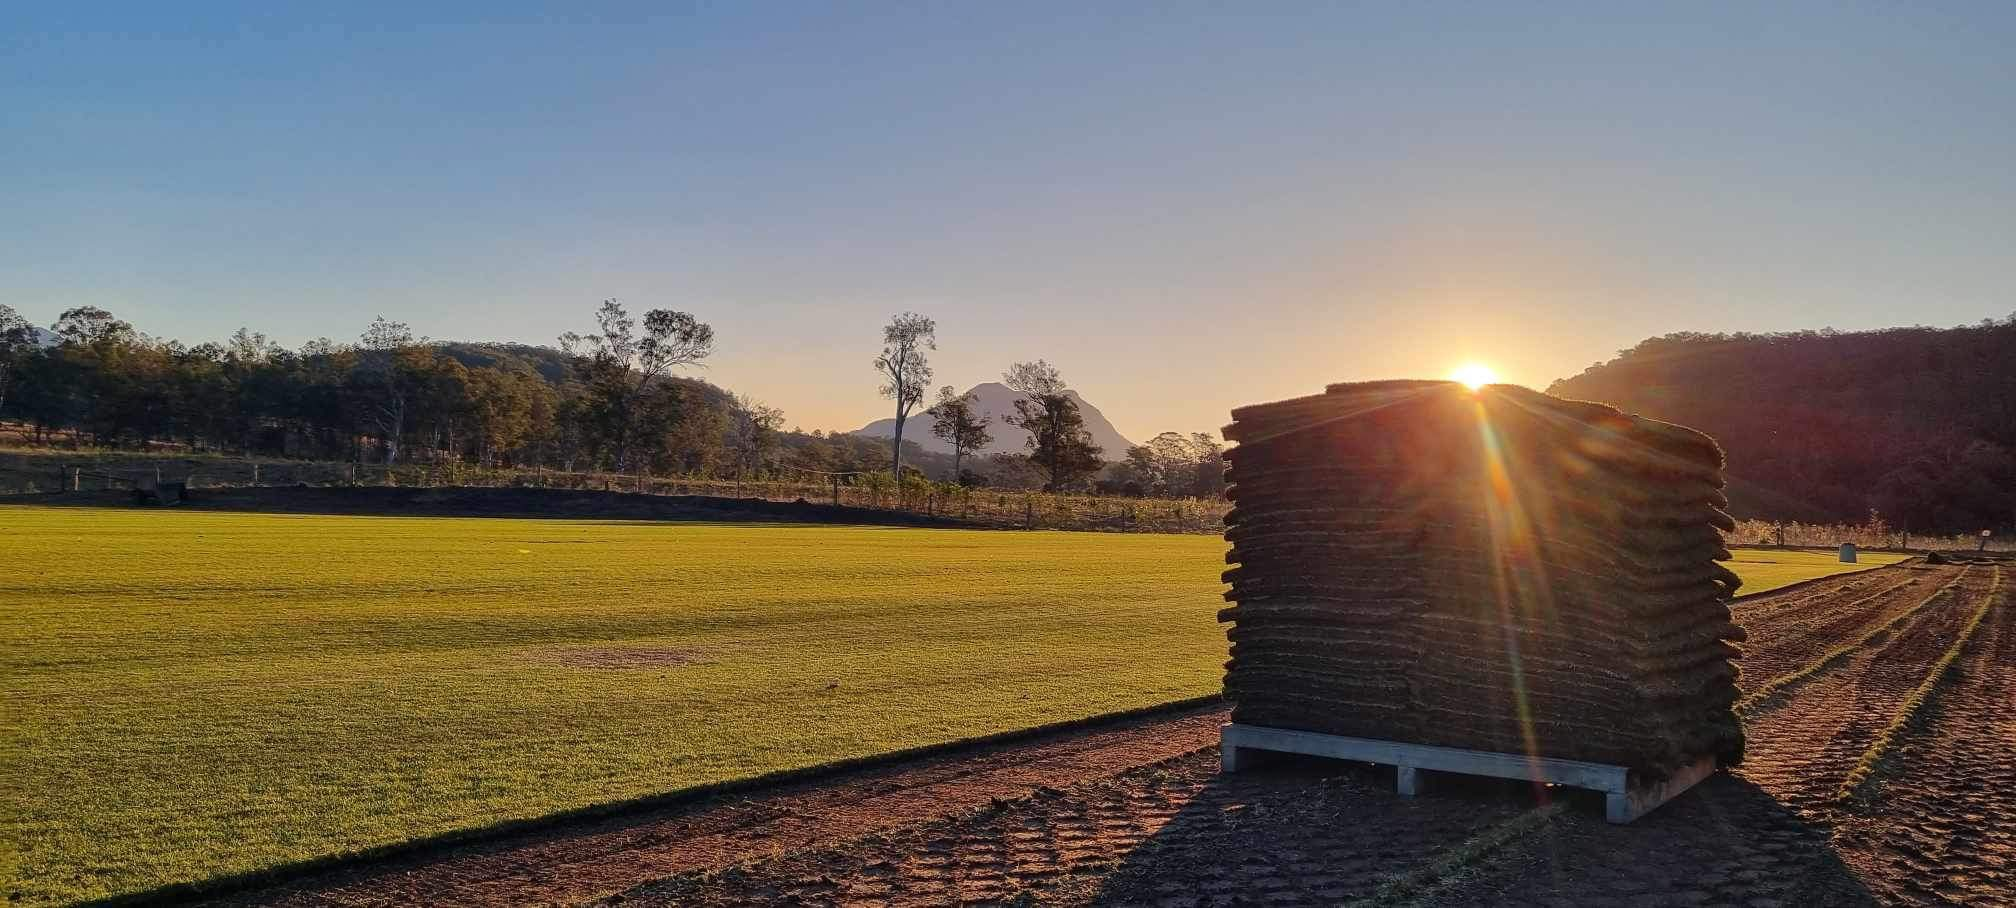
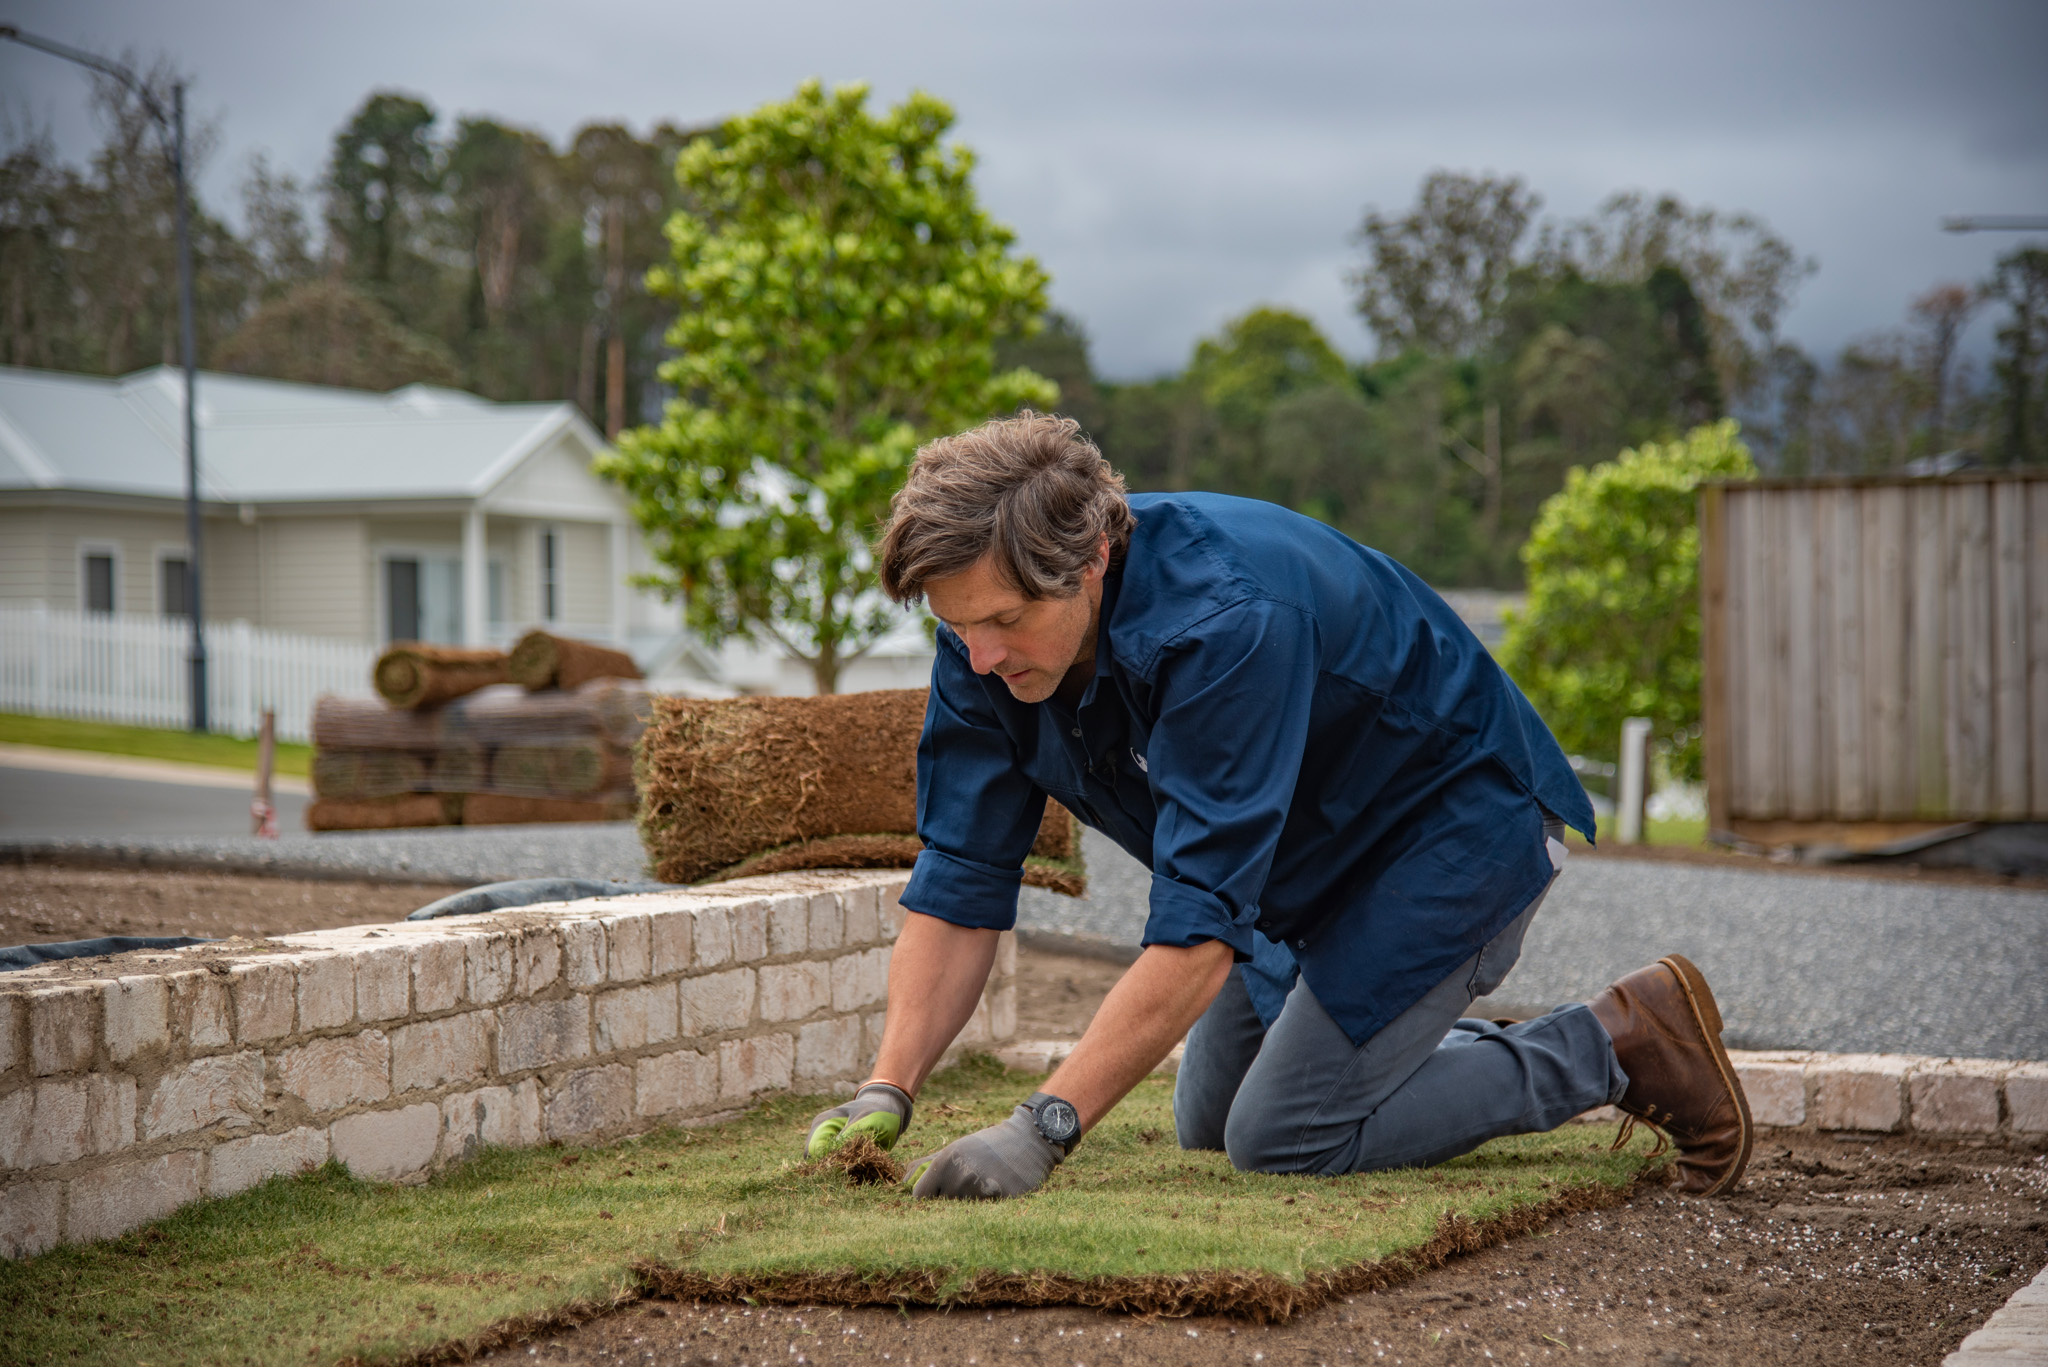
Turf Installation onto your freshly prepared soil

  1. Apply a pre turfing fertiliser such as Lawn Launcher which contains fast and slow release fertiliser and water crystals. Rake this into the surface.
  1. Install your instant turf as soon as the turf arrives.

TIPS:

  • When turf laying, check that the soil is not too hot prior to laying turf. Lightly wet the soil down to cool it off.
  • In hot weather, make sure you water each section as you lay to avoid the turf rolls drying out.
  1. Begin lawn installation at the furthest point and along the longest straight edge such as a driveway or footpath. Stagger the joints in each row in a brickwork pattern, butting and pushing the turf edges against each other tightly. If laying turf on a slope, we recommend laying turf across the slope for best results.
  2. Use a large sharp knife, garden shears or sharp spade to cut turf or trim around tress or edges.
  3. After you’ve finished laying your turf, roll the entire area, this will improve the contact between the freshly laid turf and soil removing air pockets and help with levelling.

Days 1-7

  • Watering twice daily in the morning and afternoon to the point of run off. In extreme heat conditions, you may need to water a third time to keep the leaf moist.

Days 7-14

  • IF TURF PULLS UP – Watering twice daily, giving your new lawn a good soak.
  • IF TURF WON’T PULL UP – Watering every morning.

After First Mow

  • Watering once every 2nd day or as required preferably in the morning.

TIP:

  • Whenever you finish a watering cycle, dunk a tea towel in water and hang it on the clothes line. Once the towel is dry, your lawn is ready for another drink.

The information provided above is a guide ONLY, please consider your current climate, weather conditions & temperatures when using this guide.

Now it’s time to enjoy your beautiful new lawn. If you have any questions regarding the ongoing care of your turf reach out to our friendly staff! They’d be happy to help!

How to Prepare Soil for Turf

Our expert advice will arm you with all the tips and necessary tools to get your soil prepared for laying your new turf.

Step 1: Identifying your soil type

Soil texture! Getting your soil right is one of the most important steps to preparing your soil for new turf. Let’s talk about what you’ve got and what you should have!

Clay Soils

Clay soils get really sticky when wet, and when they are packed together, it makes for a very heavy soil. A great way to tell if you have clay soil is if you can mould a sample into a ribbon and it stays together!

Clay soils hold too much moisture and don’t release it, which is bad for your grass! Because clay is a heavy soil, when it’s compacted, it doesn’t allow your grass to push its roots through and doesn’t allow air flow.

Clay Soil

Silt Soils

Silt soils feels like flour through your fingers when dry and slippery when wet, not grainy or rocky. The ancient Egyptians farmed on silted land because it was fertile; the downside is that it was picked up by the next flood and carried away. When dry, silt is easily blown away.

Silt Soil

Sand

You all know sand when you see it! Either at the beach or in a sand pit!

Water drains quickly from sandy soils, which is good in some ways as you are unlikely to have any drainage issues. However, as the water drains, it takes essential nutrients with it. Sandy soils also dry out quickly due to their open, free-draining structure and can become hydrophobic (water repellent).

Sand

Loam Soils

Loam soils generally contain more nutrients, moisture, and humus than sandy soils, have better drainage and infiltration of water and air than silt and clay-rich soils, and are easier to till than clay soils.

Loam Soil

Top Tip:

If you have a clay base, we’d recommend applying Gypsum to help decompact the heavy clay soil and add a sandy soil under-turf.

If you already have a sandy base, mixing in some organic matter will help boost your base’s nutrients.

Step 2: pH Tests

Perform a pH test on your soil using a pH testing kit. This will help guide you with what treatments your soil may require before installing your new turf. We’d like to see your pH level between 5.5 and 7.

pH testing the soil

Step 3: The Proper Soil Preparation

Spray out any existing vegetation or weeds with glyphosate. Please ensure to follow the labelled rates to allow for a total kill. Allow a minimum of two days for the chemical to work on the plant. A second application may be required.

Remove any existing grass and weeds, or cultivate/rotary hoe this into the existing soil base.

Add in a turf underlay product to make sure you have the best base for your new lawn. Always be sure to double-check your pH levels to ensure they are still within the appropriate range of 5.5 to 7.

Eliminate any drainage problems by having the soil slope away from foundations, footpaths, garden beds etc.

Rake and smooth the soil, removing any rocks, roots, or large clods.

Roll the area with a lawn roller. This will help firm the soil and reveal low areas that need more turf underlay soil.

Keep the grade 20–25mm below footpaths and driveways for the turf to sit on.

Screen off the soil to provide a smooth surface, roll, then screen again. Your soil needs to be compacted enough so that when you walk on it, you only leave a small footprint.

Top Tip:

For best results, cultivate, till, or spade the area to a depth of approximately 150mm. This would be an ideal time to add in organic matter or soil amendments that may have been required from your earlier pH test.

New turf laid on primed soil

FAQs:

What should you put down before laying turf?

Once your soil is prepared and ready for your new turf, you can spread a starter fertiliser, such as Lawn Launcher. This is a mixed starter, which includes water crystals and fertiliser.

Can you just lay turf on top of the soil?

Yes, if your soil quality is at a good pH and doesn’t require any amendments or underturf soil to relevel, you can lay it on your existing ground.

How do you flatten the soil before laying turf?

Rake, roll, and screen! Read above to find out more!

How do you enrich poor lawn soil?

Test your ground pH; this will help you understand what your soil requires to make sure you have the best growing environment for your new lawn! You may require Gypsum, Dolomite etc.

Can I lay turf on top of an existing lawn?

For a great result, it is best to remove any existing turf or weeds prior to installing your new lawn. You can either complete a total kill on the area using Glyphosate, followed by a rotary hoe in the existing lawn or weeds; otherwise, you can remove it with machinery.

How to Lay Turf

How to Lay Turf: A Step-by-Step Guide

We are so excited to be included in your new lawn adventure! Our expert advice will arm you with all the tips and necessary tools to get an exceptional-looking lawn. This easy-to-follow step-by-step guide will show you just how to do it!


Step 1: Choose a suitable grass type

Turf is the smartest investment you can make for your home; there are so many more benefits than just adding value to your property. It creates a beautiful, soft, and safe place to play with the kids or pets; it has a natural cooling effect and benefits the environment by converting carbon dioxide to oxygen even more efficiently than trees.

Consider the following traits when picking your new lawn:

  • Sun & Shade
  • Salt-affected Environments
  • Drought Tolerance
  • Wear and Tear
  • Cost and Maintenance (mowing & fertilising)
  • Look and Feel

Reach out to our friendly staff if you require assistance with choosing the perfect instant turf, like buffalo grass for your area!

Laying turf


Step 2: Check your turf underlay soil

Perform a pH test on your soil using a pH testing kit. This will help guide you with what treatments your soil may require before installing your new turf on existing grass. We’d like to see your pH between 5.5 and 7.

TIPS:

  • If you have a clay base, we’d recommend applying a clay breaker product like Gypsum to help de-compact the heavy clay soil and add a sandy soil under-turf.
  • If you already have a sandy base, mixing in some organic matter will help boost your base’s nutrients.

Checking the turf underlay soil


Step 3: Measuring and calculating how much turf you need

Measuring the square metre of your turf can be super easy! Break up your yard into geometric shapes, then add all of these shapes together to find your square meterage.

TIPS:

  • It is best to always use a consistent set of units, with millimetres and metres being the best.
  • Always double-check your measurements, and get a family member or friend to check them too!
  • After you have found your total m2, add 5% to the total to allow for cutting around odd shapes and objects.
  • You can use a tape measure, a surveyor’s long tape, or a measuring wheel.

Measuring the turf area

Step 4: Getting the perfect soil preparation

  1. To start the preparation of your soil, spray out any existing vegetation with glyphosate. Please ensure to follow the labelled rates to allow for a total kill. Allow a minimum of two days for the chemical to work on the plant. A second application may be required.
  2. Remove any existing grass and weeds, or cultivate/rotary hoe this into the existing soil base.
  3. Add in any turf underlay required to make sure you have the best base for your new lawn. Always be sure to double-check your pH levels to ensure they are still within the appropriate range of 5.5 to 7.
  4. Eliminate any drainage problems by having the soil slope away from foundations, footpaths, garden beds, etc.
  5. Rake and smooth the soil, removing any rocks, roots, or large clods.
  6. Roll the area with a lawn roller; this will help firm the soil and reveal low areas that need more turf underlay soil.
  7. Keep the grade 20–25mm below sidewalks and driveways for the turf to sit into.
  8. Screen off the soil to provide a smooth surface, roll, and then screen again. Your soil needs to be compacted enough that when you walk on it you only leave a small footprint.
  9. Lightly wet the soil to minimise dust and provide a moist base for your turf, but not so wet that it turns to mud.

TIP:

  • For best results, cultivate, till, or spade the area to a depth of approximately 150mm. This would be an ideal time to add in organic matter or soil amendments that may have been required from your earlier pH test.

Preparing the soil for turf laying

Step 5: Laying your fresh turf slabs

  1. Apply a lawn starter fertiliser such as Lawn Launcher which contains fast and slow-release fertiliser and water crystals. Rake this into the surface.
  2. Install your new lawn immediately upon turf delivery.
  3. Begin lawn installation at the furthest point and along the longest straight edge, such as a driveway or footpath. Stagger the joints in each row in a brickwork pattern, butting and pushing the turf edges against each other tightly. If laying on a slope, lay across the slope for best results.
  4. Use a large, sharp knife, garden shears, or a sharp spade to cut turf or trim around trees or edges.
  5. After you’ve finished laying your turf, roll the entire area; this will improve the contact between the turf and soil, remove air pockets, and help with levelling.

TIPS:

  • Prior to laying turf, check that the soil is not too hot. Lightly wet the soil down to cool it off.
  • If it’s a hot day, make sure you water each section as you lay to avoid the turf rolls drying out.

Laying the fresh turf slabs on the soil

Step 6: Aftercare tips for the first 6 weeks

Days 1-7

  • Watering twice daily in the morning and afternoon to the point of run off. In extreme heat conditions, you may need to water a third time to keep the leaf moist.

Days 7-14

  • IF TURF PULLS UP – Watering twice daily, giving your new lawn a good soak.
  • IF TURF WON’T PULL UP – Watering every morning.

After First Mow

  • Watering once every 2nd day or as required preferably in the morning.

TIP:

  • Whenever you finish a watering cycle, dunk a tea towel in water and hang it on the clothes line. Once the towel is dry, your lawn is ready for another drink.

The information provided above is a guide ONLY, please consider your current climate, weather conditions & temperatures when using this guide.

  • During the first two to three weeks, avoid walking on your new lawn. This allows the root system to firmly knit with the underlay and ensures that the turf will remain smooth and free from lumps & bumps.

Kid playing on the new turf

  • Giving your lawn its first mow can be done once you can no longer lift any of the turf slabs. Depending on the turf varieties, this could be as little as 7 days! TifTuf Hybrid Bermuda will establish quickly during the spring & summer months. When giving your lawn its initial mow complete this on a slightly higher setting than normal and slowly bring it down to your preferred height.

Lawn fertiliser

Now it’s time to enjoy your beautiful instant lawn. If you have any questions regarding the ongoing care of your turf, reach out to our friendly staff! They’d be happy to help!

Happy family enjoying their new turf


How to Lay Turf FAQs


What do you put down before laying turf?

Apply a lawn starter fertiliser like Lawn Launcher starter fertiliser, which contains fast and slow release fertiliser and water crystals.

Does turf need to be rolled?

Rolling your new turf will help improve the contact between the turf and soil surface by removing air pockets and helping with levelling.

Do you put sand or soil under turf?

We recommend a sand, soil, and organic blend for the best results. This is generally a mix of the following:

  • Washed river sand, medium to coarse particles
  • Some heavier soil is generally added to help hold the moisture and is mixed with the sand to create a free-flowing profile for water movement.
  • A composted material is then added, generally chicken or animal manure or natural nutrients to help balance pH levels.

How do you prepare soil for turf?

Test the pH of your soil using a pH testing kit. This will help guide you with what treatments your soil may require before installing your new grass turf, along with importing fresh under-turf soil.

How long does new turf take to root?

Depending on the turf varieties, this could be as little as 7 days! TifTuf Hybrid Bermuda couch grass will establish the turf area quickly during the spring & summer months.

How much soil do I need under new turf?

50mm to 200mm + depending on your situation. We say a good growing medium is 100mm plus.

Can you lay turf in winter?

Yes, you can, laying turf through winter is great because you don’t have water your lawn laid turf anywhere near as much as what you would during spring and summer. The only downfall with installing during winter is the turf varieties are in dormancy. The establishment period will be longer.

Is it better to lay turf or seed?

It is best to lay turf, here’s some cons to using seed:

  • A lot of waiting for the seed to establish and become a lush green lawn. The time frame can be 8 weeks up to a year.
  • Potential uneven germination. This can result in a patchy lawn.
  • Weather can negatively impact germinating seeds. Your worst enemies are heat, high winds and high rainfall.
  • You’ll use a lot of water so that your seed’s don’t dry out as they germinate.

How do I prepare the ground when laying on clay?

If you have a clay base, we’d recommend applying a clay breaker product like Gypsum to help de-compact the heavy clay soil and add a sandy soil under-turf.

Can you just lay turf over grass?

We wouldn’t recommend it, spray out any existing grass types and weeds with Glyphosate. Please ensure to follow the labeled rates to allow for a total kill. Allow a minimum of two days for the chemical to work on the plant. A second application may be required.

What happens if I walk on new turf?

If you walk on your new turf whilst it’s establishing this can cause diverts and lumps within your freshly laid turf. Try not to walk on your new lawn for two to three weeks, this allows the root system to firmly knit with the underlay and ensure that the turf will remain smooth.

When can I mow my newly laid grass?

Giving your lawn its first mow can be done once you can no longer lift up any of the turf slabs. Depending on the turf type you have, this could be as little as 7 days! TifTuf Hybrid Bermuda will establish fast during the spring & summer months. When giving your lawn its first mow complete this on a slightly higher setting than normal and slowly bring it down to your preferred height.

How long after laying turf can you feed it?

Apply Lawn Solutions Fertiliser in 6-8 weeks time to finish off the lawn establishment phase.

I have a dog. Will my turf survive?

The key is picking the perfect turf type to handle the wear and tear and your environment. Reach out to our expert staff for advice on which turf variety will suit you.

Which is the Best Zoysia Grass?

Zoysia turf varieties are a favourite when it comes to many Aussie homes for their fantastic colour and versatility across many areas, but what is the best variety? Zoysia Australis is the best option for families who use their area frequently. Sir Grange Zoysia is a premium low-maintenance option for a more sophisticated show garden or display area.

Best Zoysia for Families

Zoysia Australis is the best zoysia grass for families. It can stand up to the daily stresses that you and your family will throw at it, while still performing beautifully while still showcasing beautiful zoysia traits. Here are some of the main reasons why Zoysia Australis is considered the best zoysia for families:

  • Has a good shade tolerance. Zoysia Australis needs a minimum of 4 hours of direct light and is well suited in full sun areas.
  • Has a good wear tolerance and recovery for a zoysia. It can stand up to regular foot traffic from pets and kids and if it does become damaged, it will be able to repair itself quickly.
  • Has a fast establishment. This means you can get out and use your lawn faster.
  • Soft, medium leaf that feels great underfoot and great to play on.
  • Has a beautiful blue/green colour.

zoysia australis

Zoysia Australis is part of the Zoysia japonica family. It can stand up to the stresses of a family and pets and has shade tolerance to thrive where other grasses falter.

Zoysia Australis is one of the latest turfgrasses to hit the Australian market. It was bred by Dr. Brian Schwartz at the world-famous University of Georgia, Tifton campus. This grass has been undergoing trial work here in Australia since 2018 with a range of elite zoysia grasses, with Zoysia Australis coming up on top.

zoysia australis

Best Zoysia for Show Gardens and Manicured Lawns

Sir Grange Zoysia is the best zoysia if you are after a high-end show garden! It has a stunning fine blade with a beautiful dark green colour. Sir Grange is a slow-growing grass, meaning it has lower mowing requirements compared to other faster-growing grasses. Sir Grange also can look great when mown as low as 5mm, maintained at any height and can even be left unmown for a more textured and landscaped look. This ability to be left unmown makes it ideal for areas that are difficult to mow.

Sir Grange zoysia

Here are some of the main reasons why Sir Grange Zoysia is considered the best zoysia grass for show gardens and manicured lawns:

  • Soft, fine, dark green leaf.
  • Slow growing requires up to 50% less mowing than other common turf varieties.
  • Can be mowed at a variety of heights – can even be left unmown for a more textured look.
  • Is a low-input grass, requiring 75% less than other common turf varieties.

Sir Grange Zoysia also known as Zeon Zoysia is a fine-bladed Zoysia matrella. It was hand-selected from over 10,000 different turf cultivar varieties. Sir Grange was developed by one of the largest turf grass breeders, Blade Runner Farms in Texas, by Mr David Douget. Bladerunner Farms has the largest privately owned zoysia grass research facility in the world.

sir grange

This grass has been used on many world-famous projects such as the Rio Olympics Golf Course. It can be seen on several courses designed by Greg Norman and Tiger Woods. This turf type was originally developed for the golf industry, but it was soon discovered that due to its characteristics, it would make a fantastic home lawn!

As always, if you have any more questions please don’t hesitate to contact us for free expert advice on 1800ALLTURF (1800255873) or 07 5543 8304.

The Lawn Weed Removal Guide

If you mow your lawn correctly and frequently, you should manage to avoid the invasion of most weeds. But if you have found that some of these undesirable weeds have infiltrated your lawn, then there is a few methods for weed removal.

Weed Removal Options

Hand Removal

Many small weeds can be carefully pulled out by hand; however, you will need to make sure you have removed the roots. Using a weeding trowel or long handled mechanical device and prizing around the roots will help ensure total removal. The bigger the weed, the bigger and stronger the roots.

To make this job a little easier, you might want to try a standing weed puller like the Fiskars Xact Weed Puller.

weed puller

Herbicide Treatment Options

There are various herbicides available, including selective and non-selective types.

Non-selective products like Round Up (Glyphosate) kill most plants including your lawn; selective herbicides target specific weeds only.

It is strongly recommended that you consult your local nursery or turf expert to properly identify the weed in question first, so you can treat it with an appropriate and effective spray.

Post-emergent Broadleaf Herbicides

For common broadleaf weeds like cudweed, clover, bindii or creeping oxalis, you can use a broadleaf herbicide like Amgrow Bin die or Lawn Solutions All Purpose Weed Control. These products generally contain actives like Bromoxynil, MCPA and Dicamba. For buffalo lawns, except ST varieties, make sure you use the Bromoxynil based products like Lawn Solutions All Purpose Weed Control as Dicamba can harm your buffalo grass.

Some other weeds require a particular herbicide for treatment, so identification is very important.

Quick selective weed killer solutions guide

  • Winter Grass – Amgrow Winter Grass Killer (Not safe on Kikuyu or Fescue)

winter grass killer herbicide

sedge control herbicide for nutgrass

  • Paspalum, Crabgrass, Summer grass – Paspalum herbicides contain the active DSMA. Make sure it’s safe to use on your turf as many varieties like buffalo and kikuyu are spot treatment only.

Prevention – Pre-emergent Herbicides

There is also a way to prevent some weed types from appearing at all.

A pre-emergent herbicide like Oxafert targets weed seeds before they take hold. It works by forming a barrier at soil level that stops the germination of any new seedlings. Pre-emergents can be used in the prevention of Winter Grass, Summer Grass, Crowsfoot and Crab Grass.

pre-emergent

Organic options

If your preference is to avoid the use of herbicides on your lawn, then there are some organic weed treatments which may work against particular weeds.

Some of these options include boiling water, salt, vinegar, cornmeal gluten and nonanoic acid – but keep in mind that these will almost always be non-selective and will harm your lawn as well, so spot treating is the way to go.

With the use of any herbicides, always make sure you wear the appropriate protective equipment including gloves and a mask, follow the label instructions and make sure that the particular product is safe to use on your turf variety.

As always, if you have any more questions please don’t hesitate to contact us for free expert advice on 1800ALLTURF (1800255873) or 07 5543 8304.

The Secrets of the Turf Pro’s

Want to know some insider knowledge on how the turf professionals keep their grass in tip-top condition? In this blog, we catch up with three industry leaders within the turf world and hear some of their advice on how to take your lawn to the next level.

Joe Rogers – Lawn Solutions Business Development Manager

Joe lawn solutions australia

Lawn Tip 1. Mow Regularly

By mowing regularly, you can help promote lateral growth and encourage your lawn to form a tighter growth habit. This makes your turf more wear tolerant, more aesthetically pleasing and helps it naturally choke out weeds. The main reason why golf courses and sporting fields look fantastic is they are mown 2-3 times per week. By mowing frequently, you can drastically improve the look of any lawn quickly.

mowing TifTuf

Lawn Tip 2. Be Disciplined in Your Approach to Fertility

Whether or not you are fertilising with up-front nitrogen every six to eight weeks or using a controlled-release product with more P & K & trace elements every six months, it is important to ensure you have discipline with your application. This includes ensuring timing is regular and as per the recommendations and ensuring you stick to label rates. Chemical companies put a lot of effort into ensuring label information is correct, so it is best you follow it.

NPK

Lawn Tip 3. Embrace Technology

New turf types and lawn care products are coming to the market regularly. Instead of avoiding them, use them as they will provide many benefits to your lawn. New turf types like TifTuf Hybrid Bermuda and Sir Grange Zoysia require less inputs to produce better results. New turf care products have lower active ingredients, require fewer products and are safer to apply both for you and the environment. So rather than keeping to the same products that you have used for years, keep an eye on new and emerging technology to use it for your advantage.

Simon Adermann – Lawn Solutions National Manager

Simon lawn solutions australia

Lawn Tip 1. Ensure Mower Has Sharp Blades 

When mowing with blunt blades, bruising can occur to the leaf tips and a clean cut isn’t achieved. At the start of each spring, replace or sharpen blades ready for the growing season ahead.

mower blades

Lawn Tip 2. Soil Analysis 

Getting the peak performance from your turf, or if your turf isn’t performing a soil analysis, is recommended in spring. With results and recommendations, you can then find the right nutrient balance for your soil to ensure your turf is healthy and get the most out of your fertiliser applications.

ph testing for lawns

Lawn Tip 3. Water Management

Water management is critical during extended periods of dry weather. Using water-efficient turfgrass is the key; however, soil can become hydrophobic and water won’t penetrate well. Wetting agents like Lawn Soaker are a key solution for water management and will allow even water movement through the soil profile. This will improve water efficiency and help with evenness of colour and growth of your lawn.

lawn soaker
LAWN SOAKER

Michael Sutton – AusGAP Program Manager

michael sutton ausgap

Lawn Tip 1. Understanding Nutritional Value 

It is important to have a basic understanding of what you are using and what will be the nutritional value it will have to the plant and/or soil. This way, you can help ensure your lawn isn’t getting too much of one nutrient and isn’t deficient of another. By understanding what to use and when, you can help deter other issues like disease.

Lawn Tip 2. Understanding the Site You Are Going to Turf

By understanding your site, if you want to install turf, you can then make a better decision of what varieties will be suitable for the area. Some main areas to look into include how many hours of direct light the lawn will receive, the existing soil type (and if amendments need to be made prior to installing turf) and who will be using the lawn.

zoysia australis

Lawn Tip 3. Identifying Underlying Issues In Order to Treat and Address Any Ongoing Issues

So often we see people throwing a heap of expensive products at their lawns without getting to the cause of the problem, often making the issue worse or leading to wasted product and money. So, it is best to identify the problem, identify the solution and execute a treatment plan. If in doubt, consult with an expert.


As always, if you have any more questions please don’t hesitate to contact us for free expert advice on 1800ALLTURF (1800255873) or 07 5543 8304.

The Top 10 Lawn Care Mistakes to Avoid

When it comes to lawn care, there are some activities that your turf will praise you for, but others that should be avoided. In this blog, we look at what lawn care mistakes to avoid that can cause more damage than good.

1. Infrequent mowing

One common lawn care mistake is not mowing your lawn frequently enough. Not mowing your lawn frequently can result in having an overgrown lawn and can cause extra stress to your grass. This stress can make your lawn thin and sparse, especially after mowing.

So how should I mow my lawn? We recommend using the one-third rule when mowing. This rule looks at mowing your lawn regularly enough so that only one-third of the leaf is removed with each pass. During the cooler months, the lawn will be growing at a slower rate. This means you won’t need to mow as frequently. However, during the warmer months, you will need to mow more frequently to keep up with accelerated growth.

mowing height

2. Compacted soil base

When a lawns soil base is compacted, it can be more difficult for water, nutrients, and air to travel down to your lawn’s roots. It also makes it more difficult for your lawn to establish a good root system. Some issues that can arise from a compacted soil base include drainage issues, bare patches, weeds, dry patch, and fungal diseases, to name a few.

What can a compacted soil base be caused from? Compaction mainly occurs when there is heavy traffic on your lawn and a lack of water.

So, what should you do if your lawn has a compacted soil base? We recommend giving your lawn an aerate with a garden fork or use a tyne aerator to help alleviate compaction.

3. Over-fertilising your lawn

Applying fertilisers to your lawn is a good thing and can help improve the health of your lawn. But too much of a good thing can cause harm to your lawn. Over-fertilising your lawn will cause sudden plant growth. The problem with this is that the roots won’t experience the same amount of rapid growth and will then be unable to supply the water and nutrients your grass needs. In addition, as fertiliser is primarily made up of mineral salts, excessive fertilising will cause salts to build up in the soil, making it difficult for water to be absorbed, drying out your grass, causing discolouration and possibly even plant death if bad enough.

When applying fertilisers to your lawn, it is best always to follow the correct application rate and instructions and ensure you water correctly after application.

grass fertiliser

4. Letting weeds invade your lawn

Having weeds grow your lawn is expected from time to time. But if weeds are left untreated, they will continue to grow and spread throughout your lawn. Therefore, treating weeds as they appear to prevent the spread is best.

5. Watering your lawn incorrectly

When it comes to watering your lawn, there are a few golden rules to follow:

  • Water your lawn for longer, less frequently.

This will help encourage your lawn to grow its roots deep down into the soil profile, helping improve the drought tolerance of your lawn.

  • Water in the morning before the heat of the day.

It is best to avoid watering in the late afternoon and evening to help stop your lawn from sitting damp overnight. Watering at this time can lead to fungal issues as the lawn will sit damp for a long period of time. Watering in the morning can help prevent these issues from arising.

6. Incorrect application of lawn care products

One common lawn care mistake is incorrectly applying lawn care products. When using lawn care products, it is vital to ensure you read and follow application instructions and rates. If these are not followed, the product may be ineffective with what you want to achieve. It can cause other issues, including burning and in extreme cases, killing your lawn. If you are unsure of how to apply a lawn care product, it is always best to check with the product manufacturer before application.

7. Not enough sunlight

Just like all plants, grass too needs sunlight. Sunlight allows grass to produce the food it needs to survive. Glucose, otherwise known as sugar, is produced by the grass and is used as food to help your lawn grow. Without sunlight, your lawn will not be able to produce glucose, causing the grass to thin out and die.

While all turf varieties need sunlight to thrive, some are more shade tolerant than others. This means some varieties can better absorb sunlight than others. Generally, the wider the leaf blade on the grass, the more shade tolerant a turf variety will be. If you are unsure of what turf type is best for your area, it is best to have a chat with us.

grass in shade

8. Poor drainage 

A lawn with poor drainage can develop many problems. These include fungal, disease, weed infestation and even lead to your grass dying. So, correcting any issues with your lawn’s drainage will help prevent issues from arising next time you get a large downfall of rain.

9. Blunt mowing blades

Another common lawn care mistake is mowing with blunt mower blades. Did you know your mower blades will go blunt over time, like a razor? Blunt mower blades will rip at your grass. This not only looks bad but isn’t good for the health of your lawn. If you suspect that your mower has blunt blades, or are wanting to do a routine check-up, tilt the mower up with the front wheels pointing upwards and the handle flat to the ground.

When inspecting the mower blades, if they have any cracks, bends, extremely thin blades or even holes in the blades fin – then your blades need to be replaced. If there is still plenty of meat left on your blades and they are in their correct shape, they may simply need to be sharpened.

lawn mower blades

10. Soil pH is too acidic or alkaline?

If your lawn is not performing very well or not responding to fertiliser, this could be due to your soils pH. pH is a measure of acidity and alkalinity. Most lawns like to be in the 6 to 7.5 range for optimum performance. Measuring a soil’s pH is easy to do and doesn’t involve a complicated scientific experiment. All you need is a pH testing kit and they are readily available at hardware stores and nurseries.

If your soil’s pH is outside the recommended range of 6-7.5 you may need to adjust this.

ph testing for lawns


As always, if you have any more questions please don’t hesitate to contact us for free expert advice on 1800ALLTURF (1800255873) or 07 5543 8304.

The Wide World of Turf

Let’s take a look at some of the main varieties of grasses from around the world…

Did you know there are over 10,000 different types of grasses found across the world? With hundreds of thousands of variations found within these different types and genus.

Many of us know some of the main varieties of grasses that feature in Australian lawns. Buffalo Grass, Kikuyu Grass and Couch Grass being the three most common that we see in the majority of home lawns and public areas across the country. With many other native grasses that can be found across the landscape and bushland areas as well.

But what about the rest of the world? What grasses do they have for their lawns? Do they grow kikuyu in England? Do the Americans have buffalo grass?

Asia

The Asian continent covers a large area and as result experiences a vast range of climate conditions. Grasses most synonymous with Asia include the group of grasses known as Zoysia’s. These grasses thrive in hot conditions, particularly in East Asia with the temperate and tropical climate.

Common grasses of the Zoysia Grass genus include – Japonica (Korean Grass or Japanese Lawngrass), Matrella (Manila Grass) and Macrantha (prickly couch). Many of these grasses have also found their way to Australia with similar climate conditions experienced here.

zoysia grass

Centipede Grass is another grass variety also found in Asia native to Southern China. Like many of the zoysia’s, Centipede Grass grows quite slowly and doesn’t require frequent mowing.

The USA

The USA, like Asia, experiences significant differences in climate from the north to the south, which has also led to a large variety of grasses being used for lawns. In addition to this, the USA has taken a leading role in developing and breeding new turf varieties, primarily stemming from the performance needs of their highly competitive sports industry.

Some of the common grasses you might see in USA lawns include:

  • Kentucky Blue Grass (KBG) is a cool season grass type that performs well in the more northern states and has an admired blue-green colour. While Kentucky is known as the Bluegrass state, KBG is actually native to northern Asia and parts of Europe.

kentucky bluegrass

  • Bermuda Grass (Couch Grass) is a warm season grass commonly used in the more southern states and performs well in over 100 countries within tropical and subtropical climates. Bermuda grass is known for its hard wearing, fine leaf and is commonly used on sports fields as well as home lawns.

couch grass

  • St Augustine (Buffalo Grass) is a thick, broad leaf, warm season grass well known for high shade tolerance and weed resistance. St Augustine primarily grows best in the south-eastern USA states including Texas, and also in Mexico and South America.

buffalo grass

Other grasses commonly found in US lawns include Perennial Ryegrass, Zoysia Grass, Bahia Grass, Fescue and Seashore Paspalum.

Europe

When you think of Europe you primarily think of the cold climate areas that for many months of the year experience snow and frost. These areas almost exclusively will feature lawns of the cool season grass varieties. Those that grow best in colder conditions like Fescue and Ryegrass. In fact, it’s common for a blend of these cool season varieties be used together in the same lawn.

Common cool season grasses found across Europe include:

Creeping Red Fescue, Ryegrass, Common Bentgrass, Annual Meadowgrass and Brown-top Bent Grass.

fescue

Africa

Kikuyu grass that is also found in Australia was originally from the highland regions of East Africa and named after the Kikuyu tribe. Kikuyu is still the most popular lawn variety in many African countries, with another indigenous grass known as LM grass.

grasses from around the world

LM Grass has other common names you might recognise including Durban Grass and Sweet Smother Grass. LM Grass has a creeping growth habit like kikuyu, but it grows much less invasively. Other warm season grasses like buffalo and couch are also prevalent in many African countries.


As always, if you have any more questions please don’t hesitate to contact us for free expert advice on 1800ALLTURF (1800255873) or 07 5543 8304.

Essential Lawn Care Equipment

Welcome to our guide on essential lawn care equipment! Whether you’re a seasoned green thumb or a beginner ready to delve into the world of lawn maintenance, having the right tools will help you achieve a healthy and picturesque lawn. In this blog, we will explore a variety of must-have lawn care equipment.

What Lawn Mower is Best for Me?

Lawn mowers are the first piece of lawn care equipment you should have in your garage. Mowing your lawn regularly will not only help ensure your yard is kept tidy but will help keep your lawn healthy. Purchasing your own mower is worth the investment. Regular mowing is important whether you want to do minimal work with your lawn or take it to the next level.

We recommend mowing your lawn frequently enough so that only one-third of the leaf is removed with each pass. This is known as the one-third rule. During the warmer months, while your lawn is actively growing, you will need to mow more frequently compared to the cooler months when grass slows in growth. Mowing your lawn using the one-third rule will help limit the amount of stress caused to the plant and help avoid scalping.

The type of mower you decide to go with will depend on a few factors, including lawn size, budget, and personal preference. The popular go-to choice for most home owners is the rotary mower. Rotary mowers are especially popular for buffalo lawns, including Sir Walter DNA Certified, Zoysia Australis and Kikuyu lawns as they prefer a higher cut. Rotary mowers have spinning blades rotating on a vertical axis under a cutting deck. They work best on a medium to high cut and are now available as both petrol and battery powered. Some trusty rotary mower brands to look out for include Honda, Victa, Toro, Bosh, Ryobi, Masport, Ozito, Makita and Husqvarna.

If you have a couch lawn, like TifTuf Hybrid Bermuda, or a Zoysia lawn like Sir Grange Zoysia, or are after a lower cut, you may want to consider using a cylinder mower. Cylinder mowers will also produce a cleaner cut compared to a rotary mower as it will cut the grass and not tear it.

Why Should I Use a Knapsack or Pressure Sprayer?

Now that we have mowing your lawn under control let’s look at how you can apply other lawn care products to get the most out of your turf. Most lawn care products will come in a concentrate that need to be dissolved in water. This mix can then be applied to the lawn with a knapsack or pressure sprayer, allowing the product to be evenly applied.

There are a few different types of sprayers that you can use, from battery powered, handheld and backpack sprayers, each with different water volume sizes. For a smaller lawn, a smaller handheld sprayer like the Husqvarna 1.5L Manual Sprayer can do the job effectively. For a larger area, you should consider using a backpack sprayer or a battery powered sprayer like the 8L Battery Handheld Sprayer, or the Husqvarna 15L Battery Backpack Sprayer.

What Are the Advantages of Using a Fertiliser Spreader?

For using granular fertilisers and other granular products, you will get a much more even product application of your product when using a granular spreader compared to spreading the granules out by hand. When the trigger is pulled on a fertiliser spreader the granules are dispersed at an even rate. Fertilising without a spreader can result in an uneven growth throughout your turf.

Like the other products mentioned, a range of options are available for different area sizes. Handheld spreaders are ideal for small to medium lawn sizes. If you have a larger area, a battery-powered handheld spreader or a walk-behind spreader can be an easier option to use.

As always, if you have any more questions please don’t hesitate to contact us for free expert advice on 1800ALLTURF (1800255873) or 07 5543 8304.

To Sharpen or Replace Mower Blades?

One of, if not the most important steps in servicing your lawn mower, is making sure your mower blades are sharp and in good condition.

Blunt mower blades will rip at your grass, which not only looks bad, but isn’t good for the health of your lawn.

How do I know if they should be sharpened or replaced?

In order to determine whether they should be sharpened or replaced you need to inspect their current condition. To do so, tilt your lawn mower up with the front wheels pointing upwards and the handle flat to the ground or bench. This will ensure no oil flows where it shouldn’t, causing you even bigger problems.

If the blades have any cracks, bends, extremely thin blades or even holes in the blades fin – then your blades need to be replaced.

If there is still plenty of meat left on your blades and they are in their correct shape, they may simply need to be sharpened.

For most people, the easiest fix is to have your mower blades looked at by a professional. If you are not confident or short on time, your best option is to drop your lawn mower off at your local mower shop. The experts will be able to give the whole unit a once-over. It can be a good idea to undertake a mower service every 12 months or so, leaving your mower ready to go when you need it during the warmer months.

If your blades just need a sharpen or you are confident in replacing them yourself, here’s how to go about it for most standard lawn mowers…

How to replace your mower blades

Tools

Socket Wrench and sockets

Allen Key Set

New blades kit

Step 1. Disconnect your spark plug lead from your spark plug.

Step 2. Tilt mower upwards, front wheels in the air and handle to the bench or ground as mentioned above.

Step 3. Using the wrench, you can remove the main bolt securing the base plate to the cutting deck. Then remove the blade bolts. Or you can remove the blade bolts while the plate is still attached to the mower. The blade bolt head may require the use of an Allen key to stop them from spinning while you remove the nut.

Step 4. Remove old blades and put your new blades in place on the bottom of the base plate. The base plate will spin anti-clockwise so make sure the cutting edge of the new blades is directed towards the direction they will spin. A mower blade replacement kit will come with a plastic washer. This goes onto the bolt on the bottom of the base plate. It will also come with a steel washer for the underside and the nut to tighten it in place.

If you are going to sharpen your blades, make sure you are very careful as to only take the slightest amount off the blade and keep it even, so you don’t throw the blades out of balance.

Step 5. Put your new washer and bolts on and secure them in place tightly. The blades should still move if a decent amount of force is applied. This will enable them to absorb a hit from a large obstacle or rock avoiding damage to other components.


As always, if you have any more questions please don’t hesitate to contact us for free expert advice on 1800ALLTURF (1800255873) or 07 5543 8304.