Dry Patch & Heat Stress

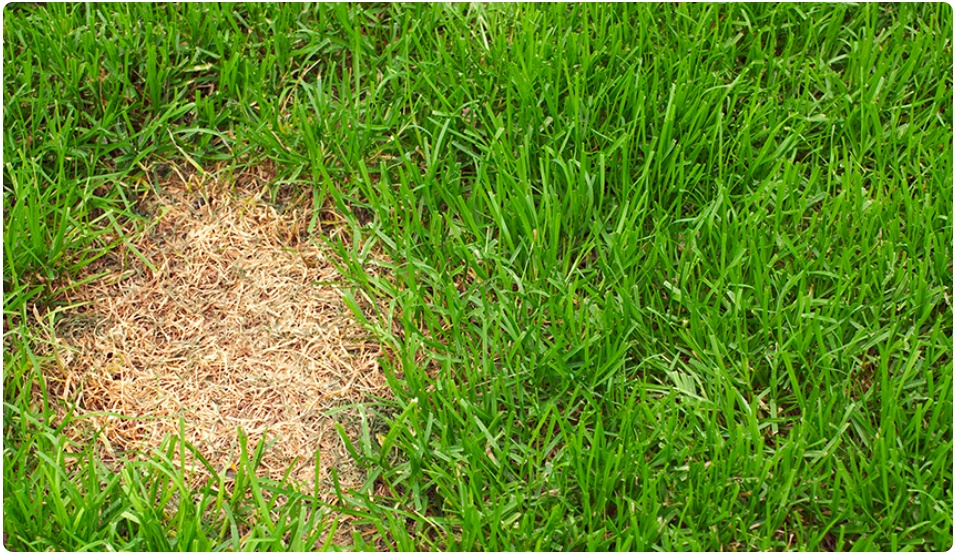
This is a common problem when our summer temperatures increase on established and new lawns under 6-12 months old. A well-managed lawn with a good deep root system will survive our hot summers but occasionally we have to help nature to ensure all available water does reach the roots. 


 Dry Patch or Heat Stress can be caused by the following;

  • Poor, shallow watering techniques encourage a shallow roots system. In the cooler months this won’t be a problem but as soon as temperatures increase the plant may wilt and go into stress. 
  • Loss of soil moisture in the soil profile. During a prolonged drought the subsoil may dry out and deep watering with a sprinkler for up to an hour in one spot may be required to start replenishing this moisture loss. 
  • Hydrophobic soils can be naturally occurring or caused by certain organics in the profile. These soils once dry, become very difficult to re-wet and a soil wetting agent is highly recommended to combat this problem. 
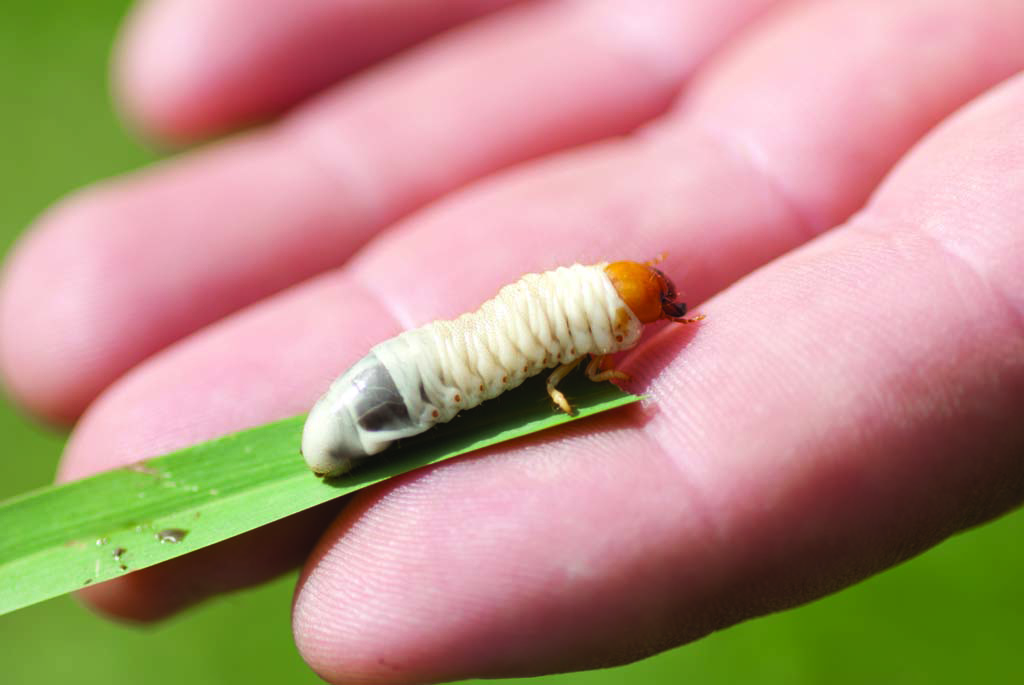
  • High thatch levels in an established lawn can prevent water from migrating into the profile. 

What to do? 

  • Reduce stress from foot and vehicle traffic. Minimise any non-essential herbicide applications.
  • Watering your lawn. No two sites are the same so the information we provide is a guide only. In South-East Qld we recommend approximately 10mm of irrigation in winter and at least 25mm in summer. Shady areas will not require this amount and exposed sites with sandy profiles may require a lot more. Measure the amount of water you are applying to any one spot on the lawn. A rain gauge is the best tool to measure the amount of water you are applying. Lawns new and old may be affected by extreme heat and dry so be on the lookout for telltale signs of stress which is usually the leaf turning to a blue-grey colour. Left unchecked and the leaf will turn brown and die. This doesn’t mean that the lawn is dead, but it may take a while for the new leaf to regenerate. 
  • Reduce thatch annually if required. Dethatch with a specialist scarifying machine or we can recommend a contractor to take care of it for you.
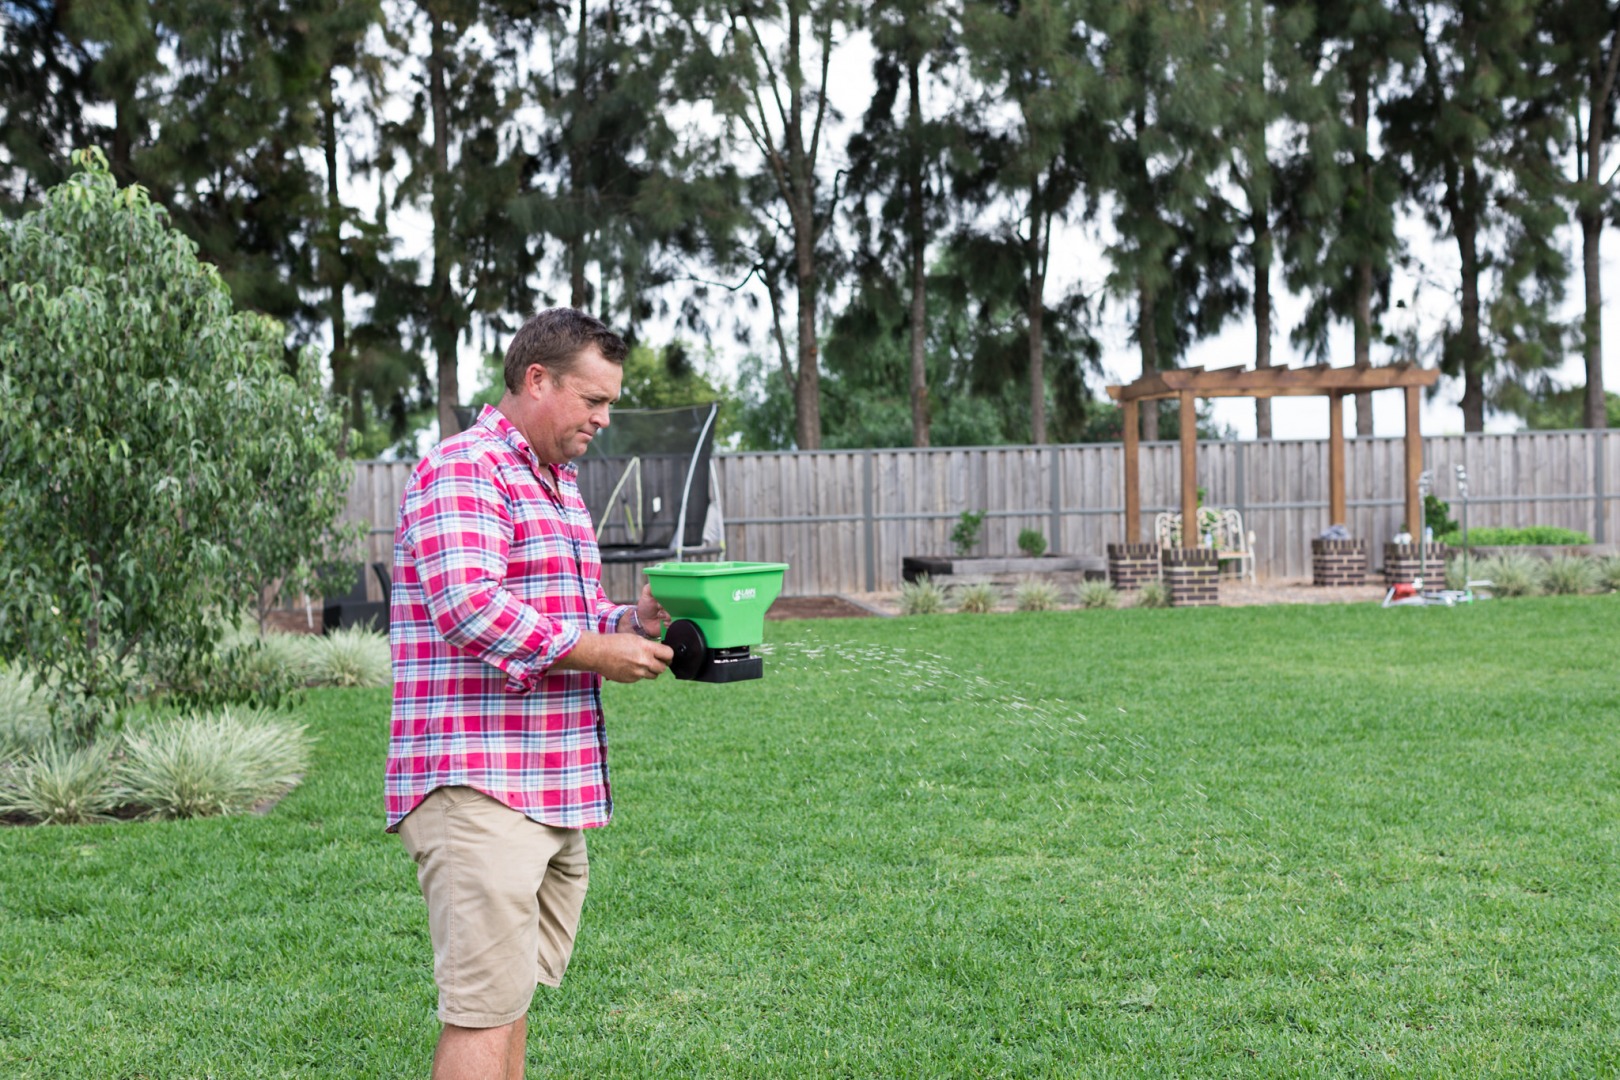
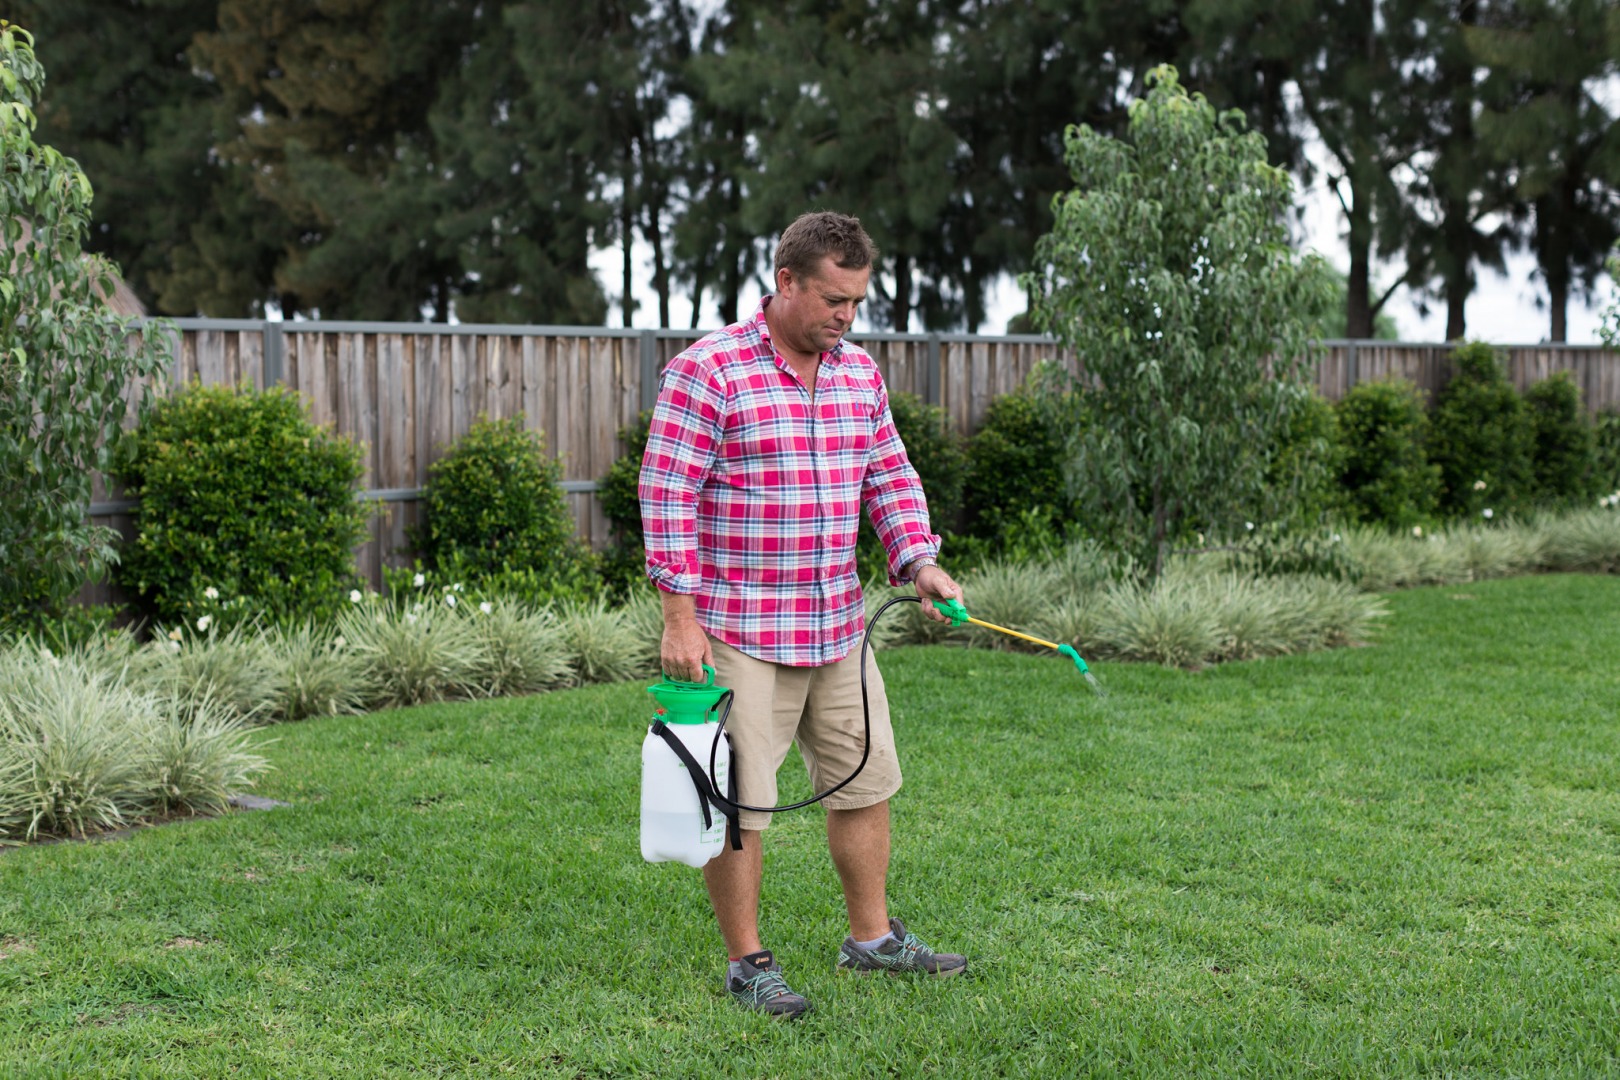
  • Improved water penetration with decompaction and aeration. Once again let us know if you need a contractor to carry this out for you. For more information on decompaction follow this link. Apply a soil wetting agent to improve infiltration from dry patches. There are a lot of products on the market, but I like the concept of combining a Kelp or Seaweed product with soil wetting agents. Other products like “Wetta Soil”, “Natrakelp” and “Seasol” can be sourced from your local garden centre or you can source products online from the Lawn Solutions store like “Lawn Rescue” and “Lawn Soaker”. Follow the label instructions and water in well. 

It doesn’t matter how drought-tolerant a lawn variety is, at the end of the day all plants need water. Some need more than others. Depending on when you installed it may take up to 12 months for a new lawn to become truly established. 


As always, if you have any more questions please don’t hesitate to contact us for free expert advice on 1800ALLTURF (1800255873) or 07 5543 8304.

Lawn Grubs

This page will help you to identify various types of pests and provide some advice on how to easily manage them yourself.


There are three types of lawn grub that eat the leaf of lawns in South East Queensland, these are; Army Worm, Sod Web Worm and Cut Worm, these are all larvae of small moths that are active from spring to autumn but more common in the wetter months from December to May. Lawn grubs prefer healthy, lush turfgrass, so be on guard during this time. 

These small moths seek out the lushest lawn and lay their eggs in flight (Sod webworm) under building eves, underneath the leaves of plants, shrubs, trees and within the turf canopy. Hundreds of microscopic larvae drift on fine threads onto the ground, the ones that land on a lawn develop into grubs feeding on the leaves of the turf plant. If hatching occurs when no wind is present, a heavy outbreak could occur and in an isolated area, this could cause complete defoliation within days. Under severe infestations, the stems of some grasses are sometimes eaten as well. The average life cycle of most lawn grubs during periods of activity is usually around three weeks. A healthy lawn will easily recover from a mild outbreak of grubs however newly established lawns left unchecked can be completely destroyed in severe outbreaks, especially on Blue Couch varieties. 

There are other pests that live in the soil and eat the roots causing unhealthy turfgrass growth. The main pest we see in SE Qld is the Black Beetle larvae. Low populations will generally not be noticeable, however, heavy infestations can cause turfgrass loss. It is difficult to diagnose as the larvae are not visible unless you expose the soil. 

 We have a new pest soon to arrive in South East Queensland.

The “Fall Army Worm” is migrating down the Queensland coast from Asia. This pest looks similar to our regular Army Worm only it is larger and more ferocious. We are yet to see the effects of this pest, but we have been advised that “Acelepryn” offers protection. 

Do you have lawn grubs and how can you check? 

  • Check the lawn in the early evening for the presence of this small white moth. Sometimes walking around the lawn will cause them to fly away, 
  • Another indicator is the presence of a small red wasp which flies low over the grass during the day, the wasp is searching the lawn for a host grub to lay its eggs into, 
  • Another method to check for the presence of lawn grubs is to lay out a wet hessian sack or a large wet rag over the suspected areas in the evening, check under the sack in the morning and the grubs should still be active in the dark cool environment, by thinking it is still nighttime. 

What can you do? 

  • For total peace of mind apply the preventive product “Acelepryn GR” in spring/ early summer to prevent infestations for up to 6 months. Acelepryn is non-toxic and safe to use. Its easily applied as a granule through a normal fertiliser spreader and provides protection for all lawn grubs including Black Beetle larvae. 
  • For a quick kill, the chemical “Bifenthrin” seems to be the most available chemical available. This product can be used as a protective treatment when applied at regular intervals or as a knockdown treatment to control existing pests. Lawn grubs generally feed at night, so for best results apply pesticide in the late afternoon or as indicated on the label. BEWARE! A new outbreak can occur within one to two weeks of spraying, if there is a lot of lawn grub activity in your area you could expect another re-infestation after the chemical has been used up.  

BEFORE YOU APPLY ANY PESTICIDE (HERBICIDE, INSECTICIDE OR FUNGICIDE) READ THE LABEL, FOLLOW THE DIRECTIONS AND BE AWARE OF SAFETY PRECAUTIONS AND FIRST AID 

We stock these products at our Tamborine office. Alternatively, you can order online from Lawn Solutions Australia.

How can you prevent it from happening? 

  • • Apply the preventative herbicide “Acelepryn” at the start of the lawn grub season. Up to 6 months of control can be achieved at a higher rate. Acelepryn is also effective at preventing Black Beetle when applied in spring. 
  • • Bug lights are quite effective. They won’t stop the larvae from dropping in and causing some damage, but they will help catch the moths laying eggs in the area and causing major outbreaks, 
  • • Do not overfeed your lawn with high nitrogen fertilizers during the summer months, alternatively use organic fertilisers and seaweed-based products that strengthen the turf plant making it less desirable for grubs to eat, 
  • • Keep an eye on lawn areas being defoliated and do the overnight sack test as mentioned earlier. Treat as soon as grubs have been identified. 


As always, if you have any more questions please don’t hesitate to contact us for free expert advice on 1800ALLTURF or 07 5543 8304.

Couch Mite

This page will help you to identify couch mite and provide some advice on how to easily manage them yourself.


Couchgrass mites are active where ever couchgrass is grown. For the most part, common couchgrass is the most susceptible while the vegetative propagated hybrid couchgrass like Tifway, Tifdwarf, and Tifgreen are usually resistant.

The couchgrass mite is rarely a problem on short cut turf found on golf course greens, tees, and fairways. Symptoms first appear as a weak growing couchgrass turf. The leaves turn a light green and curl abnormally. The internodes shorten, and the tissue swells resulting in the couchgrass becoming tufted so that a clumping pattern becomes evident in the turf stand. These tufts give the appearance of “witches brooms”. Eventually the grass loses its vigor, thins out, and if severe enough, dies.

The mite is extremely small, invisible to the naked eye – only visible under a microscope. Hand lenses usually do not have the magnifying power to make the mite visible.

The mite appears wormlike with two pairs of legs facing forward. The lifecycle of this mite is quite rapid. Under ideal conditions, the mite can complete its life cycle from hatching to an adult in 7 days. Under most summertime conditions, the adults lay eggs every 2 to 5 days with the mite completing its lifecycle in 10 to 14 days. The mites tend to develop between the leaf sheath and blade. This location makes it often difficult to get a chemical spray to the mite.

Culturally, lowering the mowing height will make for a less favorable environment for the mite. Care should be done not to cause scalping. Removing clippings will also help reduce mite populations. Irrigating and fertilising make for a healthier couchgrass turf. Miticides may or may not be effective. If used be sure to apply with adequate water and suitable spray adjuvants.

Short residual insecticides are effective but may need to be applied multiple times. In the United States many managers try to “outgrow” the mite through fertilisation and irrigation.


As always, if you have any more questions please don’t hesitate to contact us for free expert advice on 1800ALLTURF or 07 5543 8304.

Lawn Nutrition & Fertilising

We often get asked “what is the best fertiliser to use?” and the answer is not always as straightforward as you might think.

There are a few factors to consider when selecting what type of fertiliser is best for your lawn.

What time of year is it?

  • If it’s winter, dont bother, most grasses are dormant and won’t respond to the fertiliser anyway
  • if its right in the middle of summer just use a more organic & lighter rate fertiliser like Seasol (available at Bunnings)
  • The best time to apply heavier fertilisers is at the start of the spring growing season (early-mid September)

Can you water it in & apply it properly?

  • Make sure you’re available to water in the fertilisers quite well straight after application, most need about 10mm+ of water to be effectively absorbed into the roots of the turf where it’s needed
  • If using chemical fertilisers we highly recommend getting yourself a hand spin spreader, they cost $15-20 all and are great for getting consistent coverage without fertiliser burn issues

    Fertiliser burn is a nasty problem, this happens when you apply too much fertiliser to the turf and it burns it yellow/brown and can sometimes cause damage that takes months to recover from.


Here are some great quality products we recommend

For a quick green-up that can be applied anytime through Spring, Summer & Autumn

For slow-release long-lasting chemical fertiliser (best-applied start of spring & start of autumn)

To maintain optimal soil moisture, use a wetting agent twice a year (Spring & Summer)

It’s always a good idea to mix it up and put down some good heavy organics once every 2 years or so, Dynamic Lifter or compost from your local landscape yard is perfect for this.


Weed Control

Weeds commonly appear in areas where the lawn is not as healthy. This may be caused by excessive shade causing thinning, high wear areas or poor nutrition. Keeping your lawn healthy with correct maintenance & regular mowing will help it to fight off weeds on its own, premium lawn types like Sir Walter, TifTuf, Sir Grange, Empire Zoysia, AgriDark & OZTUFF have a natural defence against weeds by forming a very tightly knitted mat of grass and thatch which smother out the weeds.

Prevention is better than the cure

A great way to control weeds all year round is to use a pre-emergent herbicide + fertiliser such as OxaFert, applied every 3 months it creates a barrier at the soil level which prevents new weeds from germinating. OxaFert is available on the Lawn Solutions Australia website.

  • Some weeds can be selectively targeted with special herbicides if you have a Sir Walter Buffalo lawn though make sure it says “safe for use on buffalo” check out the range of herbicides from Lawn Solutions Australia available to purchase online are selective herbicides for control of common lawn weeds; WintergrassNutgrassBindii & Clover, if you’re struggling with any other weeds give us a call.
  • The natural alternative is to dig out the weeds by hand, just be sure to place the removed weed clumps in the bin as leaving them on the lawn may allow it to reproduce again.
  • Sometimes you will find that even after removing weeds they still grow back, this is because some weeds have underground seeds that can last for years before germinating, again the best defence is a good offence, herbicide applications and keeping your lawn healthy will be your best option.

Non-selective herbicides, also called total kill herbicides to kill almost every plant they contact.

Examples are:

  • Glyphosate (roundup), moves through the plant to the roots, usually takes 2-3 weeks to take effect, Soil is unaffected by glyphosate and won’t affect the turf’s ability to grow in the old weed location.
  • Woody Weeders, very effective control for unwanted trees and shrubs (check local regulations before removing trees).
  • Once-A-Year Path Weeders, control existing weeds and leave a weed-killing residue in the soil (that lasts for up to 12 months).

Tips for applying herbicides

  • When applying to large areas (such as lawns) carefully measure the area to be covered.
  • Weedkillers work most effectively when the plant is actively growing (usually spring, summer, autumn).
  • Read and follow label instructions carefully, a common misconception for concentrates is that if you mix extra poison in with the water then it will produce a stronger herbicide, this is simply untrue, the mix ratios have been developed by scientists to be the most effective.

Natural Grass vs Artificial Turf

The grass is always greener on the other side, but is that natural or artificial turf you’re eyeing over there?

When it comes to picking out your garden greenery, there are benefits – and drawbacks – to each option that you need to consider. We all know a beautiful outdoor space with a tidy lawn is the perfect finish to a home, but everyone’s needs and constraints are different. Plus, buying and installing the wrong turf can be costly and time-consuming – not to mention a waste of perfectly good resources.

Whether you decide to go Astro or lay some down-to-earth soil and grass on your personal plot, we’re here with all the info to help you find your perfect turf. Firstly, there are some environmental benefits to choosing artificial. Obviously, no watering or pesticide chemicals are required to keep it looking lush, and you also don’t have to burn through fossil fuels with the lawnmower on regular basis. Also, there are varieties of artificial turf that make use of recycled materials – a definite plus.

However, that doesn’t mean it’s the ‘greener’ option. This grass comes with a high carbon footprint, particularly from manufacturing and long-distance transport, and because it isn’t a living plant it does not reduce carbon, filter sediment or help provide a habitat for garden wildlife.

Artificial turf can also affect the environment around it: water run-off can send heavy metals and synthetic residue into the storm drains and a synthetic lawn actually raises the ambient temperature by absorbing and radiating heat, unlike real turf. And that water you save not having to keep it lush? Keep in mind you still have to clean it somehow. Finally, for disposal, this turf will usually end up in landfills, which isn’t very environmentally sustainable.

Even though natural turf requires regular watering and maintenance, there are clear benefits to the surrounding environment, as it improves soil quality and biodiversity. You still have to be careful with chemical runoff from herbicides and pesticides, but this can be controlled with some sound knowledge of turf management. Over the life cycle of natural turf, there is a lower carbon footprint, and even a ‘carbon sink’ removing CO2 from the atmosphere.

With the right information, you can find turf to fit your lifestyle. All Turf Solutions does not supply or install artificial turf, but if you decide that option works best for you then we are more than happy to refer you to one of our recommended contractors.

Give us a call on 1800ALLTURF for more information.

DIY Turf Installation

This handy guide has been prepared to help you get the best result for your lawn installation in Brisbane, Ipswich & the Gold Coast. By following these steps you will be able to install & maintain your new lawn like a professional.

Site Preparation

  • Spray out existing lawn & weeds with Glyphosate (Roundup), follow the label for rates to give the maximum kill, allow a minimum of 5-7 days for the chemical to work on the plant, a second application may be required, if you wait until the existing lawn is totally brown & dead it will be easier to remove,
  • Either remove old lawn and weeds or cultivate this into the base soil, for best results cultivate, till or spade the area to a depth of approximately 150mm, this is also an ideal time to add soil amendments like Gypsum, Lime and extra organics,
  • Test your soil with a pH test kit to check if you need to add any additional products to balance your soil’s pH (somewhere between 6 – 7 is ideal for lawns)
  • If you have poor soil, cap this off with good quality under turf soil such as TurfGro to a depth of 50 to 200mm. Allow for 30% compaction of your soil when ordering,
  • Eliminate drainage problems by having soil slope away from foundations, footpaths, garden beds etc. and towards drains,
  • Rake and smooth soil whilst removing rocks, roots, and large clods,
  • Roll the area with a lawn roller, this will firm the soil surface and reveal low areas that need more soil,
  • Keep the soil level 30mm below footpaths, patios and driveways for the new turf to sit into (40-50mm for buffalo).
  • Apply a pre-plant fertiliser like Lawn Launcher which contains a pre-plant fertiliser and water crystals that help boost your new lawns drought tolerance,
  • Screen off the soil to provide a smooth surface, roll, then screen again. Your soil needs to be compacted enough that when you walk on it you only leave a small footprint.
  • Lightly wet the soil to minimise dust & provide a moist base for your new turf, but not too wet that it turns to mud.

preparing.png


Turf & Lawn Installation Brisbane, Gold Coast & Ipswich

  • Prior to laying turf check that the soil surface is not too hot. Lightly wet the soil down if it is hot.
  • Install your lawn immediately upon delivery. Turf is degrading on the pallet, and it is recommended that all turf should be laid within 4 hours of delivery in summer/spring & 12 hours in winter/autumn, failing to do so can lead to pallet burn.
  • Begin installing turf along the longest straight line, such as a driveway or footpath
  • Butt and push end against each other tightly, without stretching.
  • Stagger the joints in each row in a brick-like fashion, using a large sharp knife to trim corners.
  • On slopes, place the turf pieces across the slope.
  • After installing the turf, roll the entire area, this will improve the contact between the turf and soil and help with levelling.
  • Begin watering the lawn within 30 minutes of installation. Turf is a living plant that requires ground contact and moisture.
  • During the first two weeks, avoid heavy or concentrated use of your new lawn, this gives the roots an opportunity to firmly knit with the soil and ensures that the turf will remain smooth.

turflaying.png


Initial Watering

We recommend applying 10 litres of water per square metre on the initial installation, you need to get the top 25mm of soil under the turf saturated.

The information provided below is based on the climate of South East Queensland, take into account your current climate & temperatures when using this guide

  • Week 1: water lightly up to three times a day during spring/summer, once a day will be enough in autumn/winter.
  • Week 2: roots should have formed by now, to check simply lift up the corner of a slab and look for little white shoots, watering can now be reduced to once per day but watering should now be longer, this will soak the water in deeper which encourages the roots to search deeper.
  • Week 3: Water a couple of times per week. Again, increase the watering time to encourage deep rooting. The full establishment could take between one and three months depending upon the season & grass type. You should be mowing by now. But never mow off more than one third “1/3” of the leaf at any time.